Quick User Guide
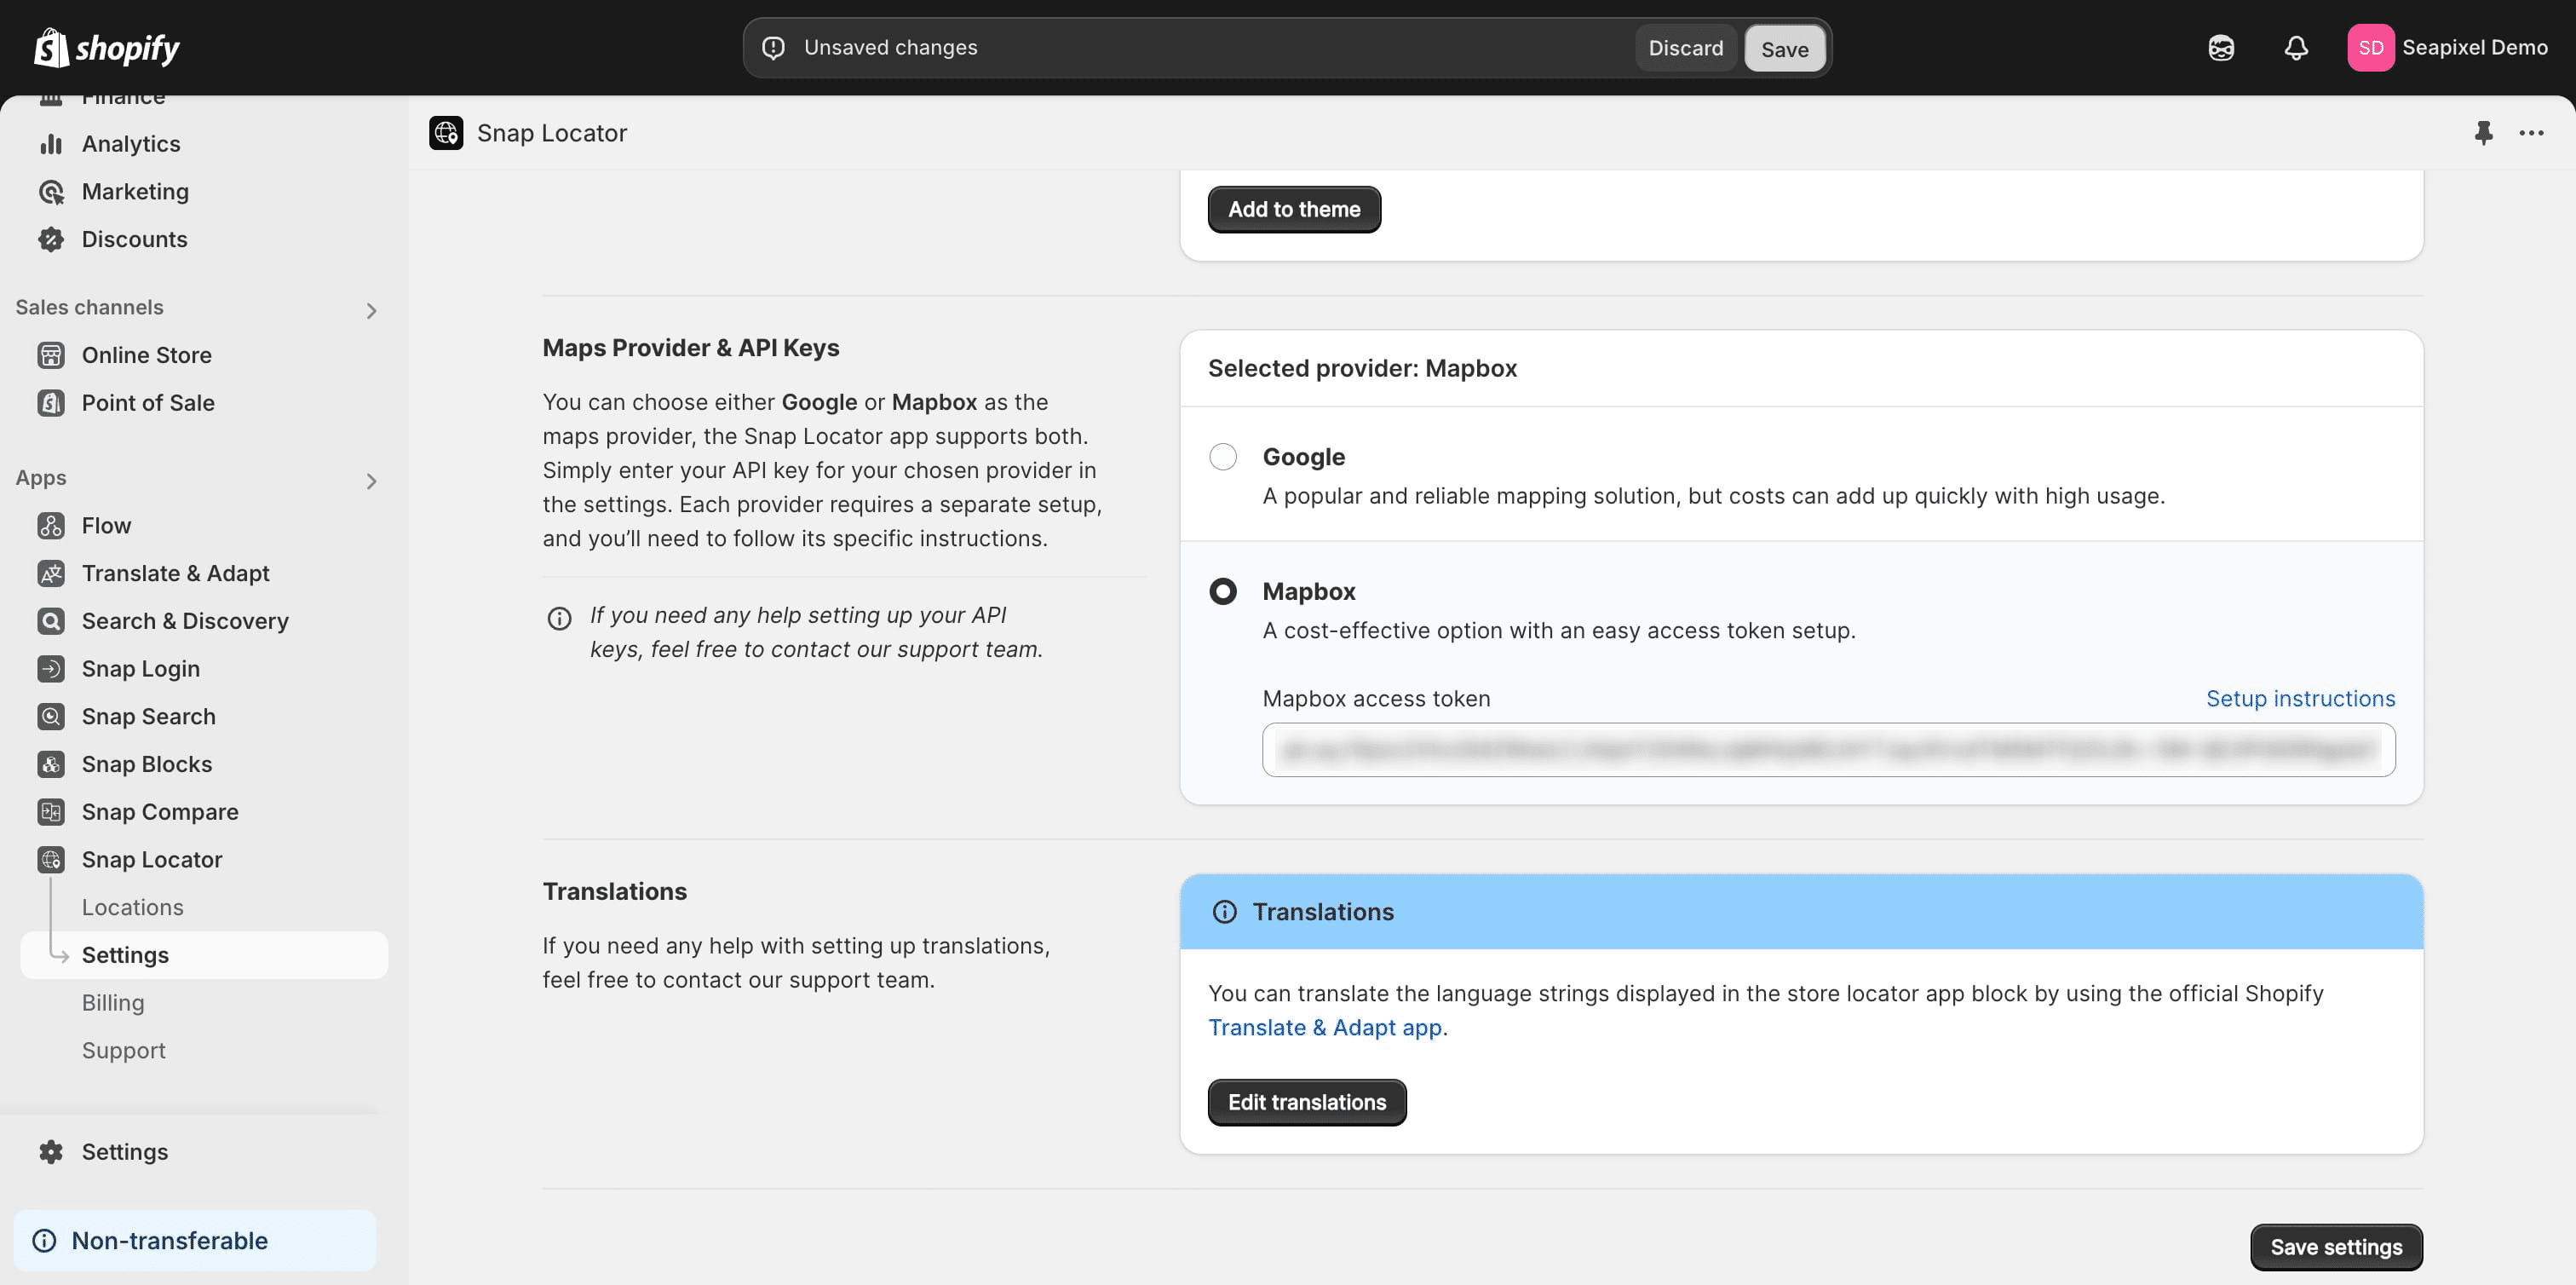
To start, configure the Maps API key within the settings section of the application.
Choose either Google or Mapbox as your map provider, and enter your API key or Access Token accordingly. Each provider has a unique setup process, and we offer tutorials to guide you through configuring the correct keys.
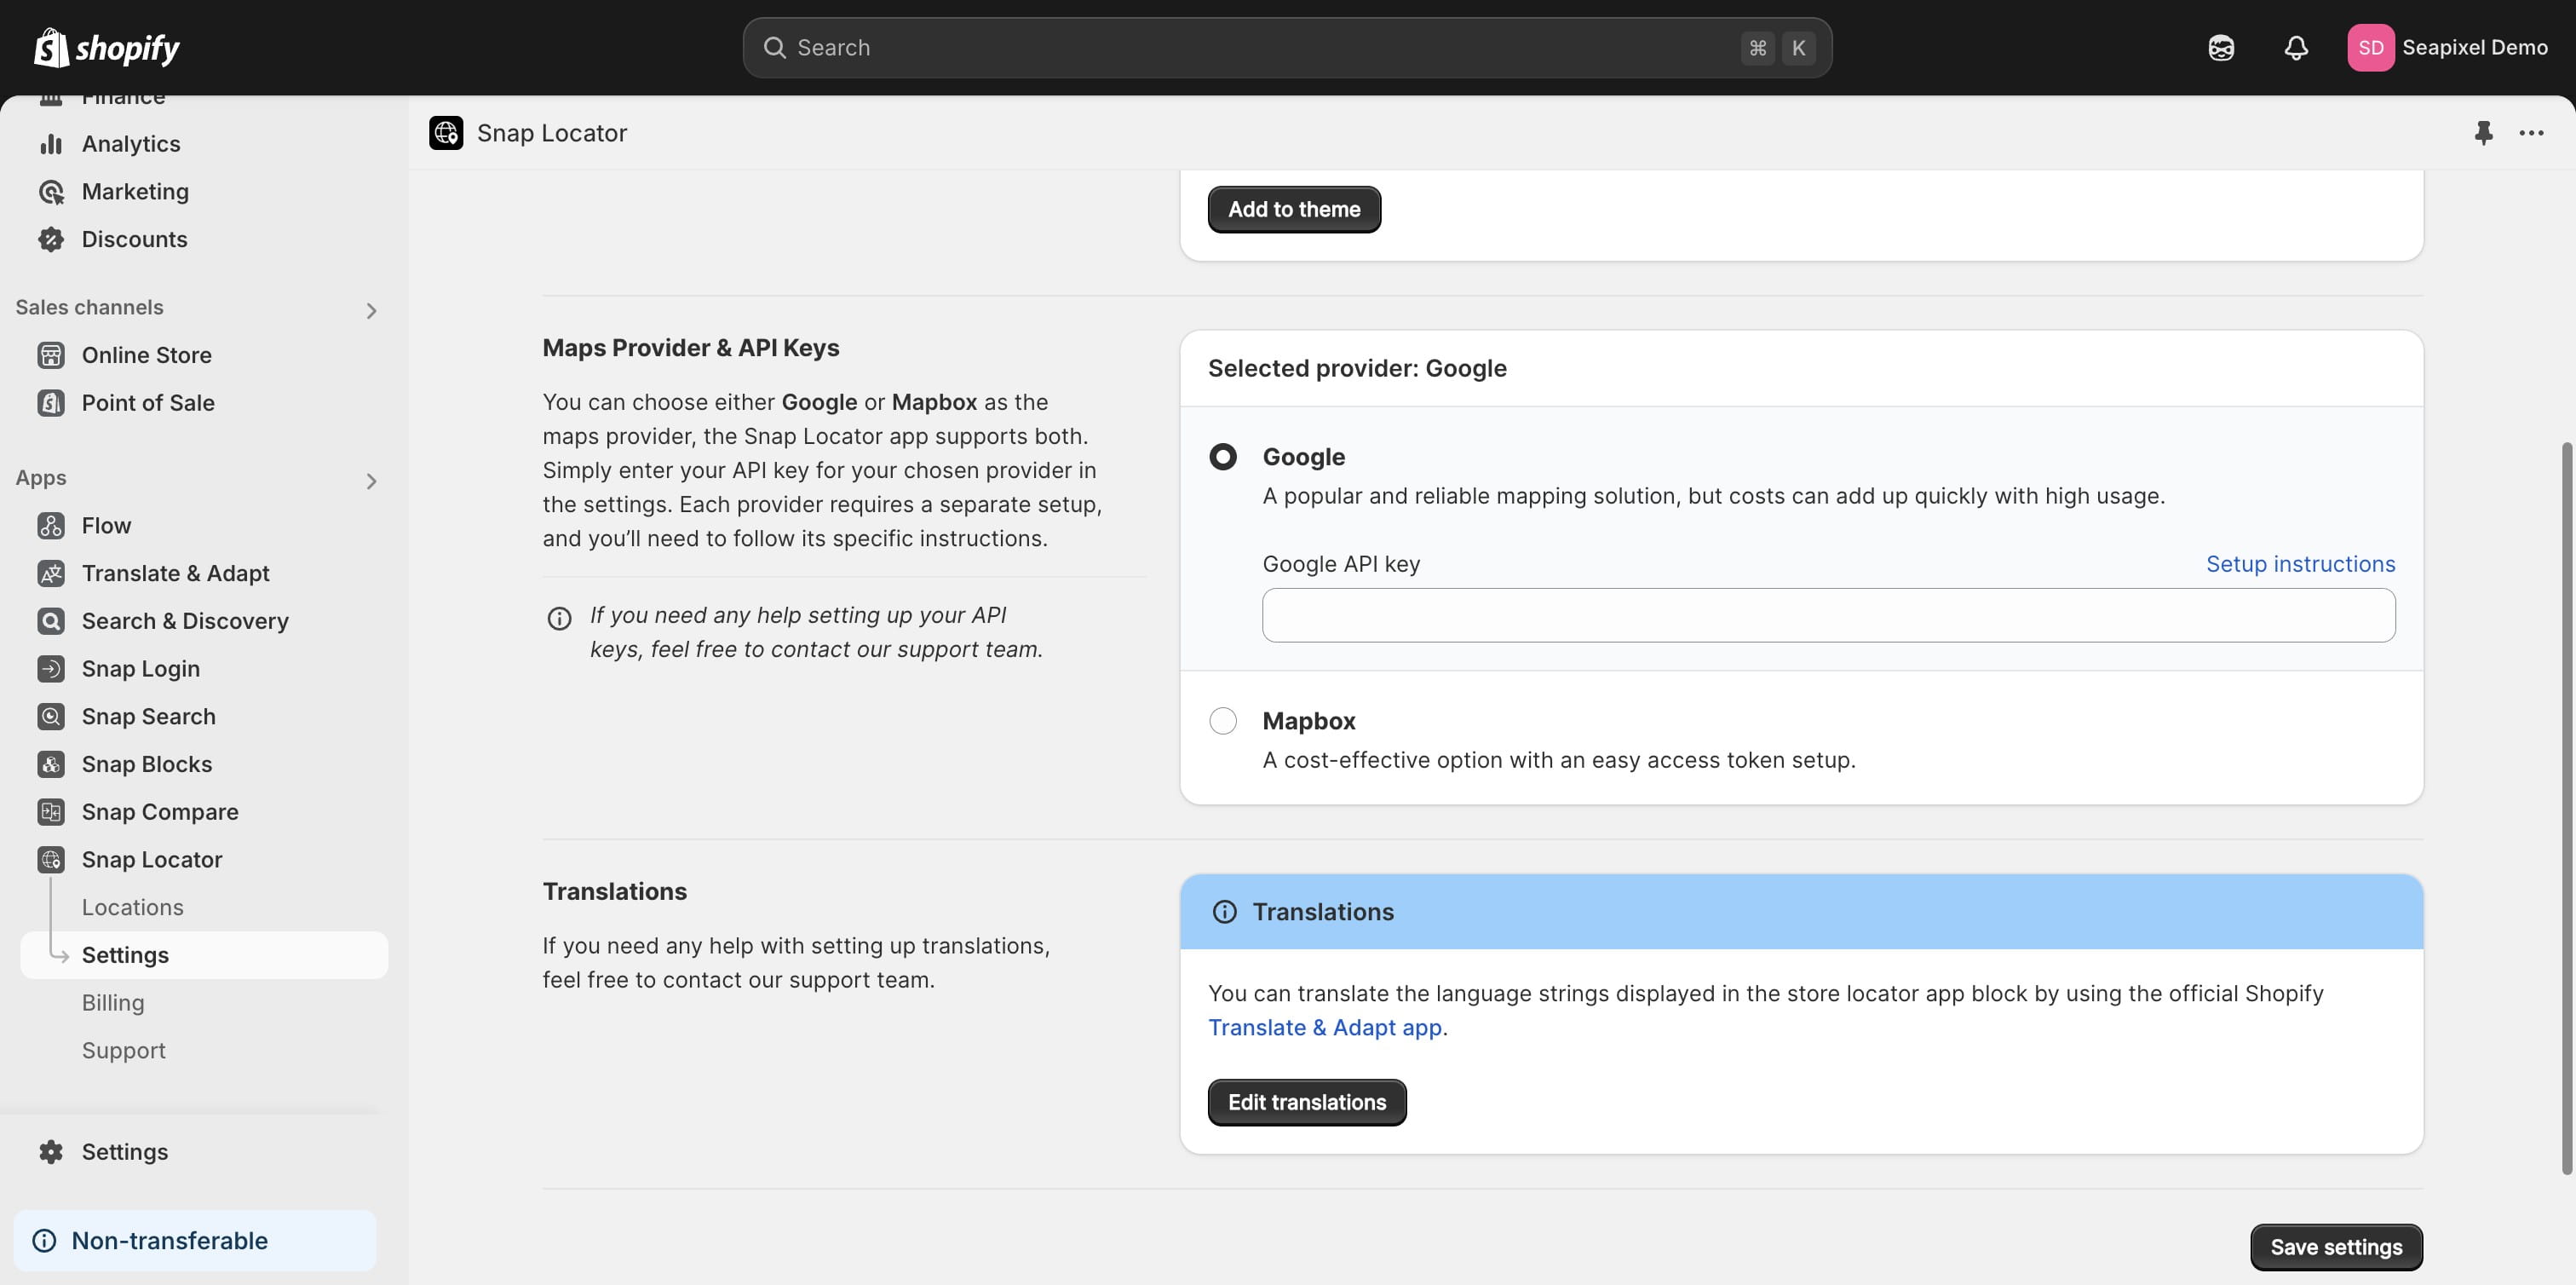
For the purpose of this tutorial, we will be using Mapbox.
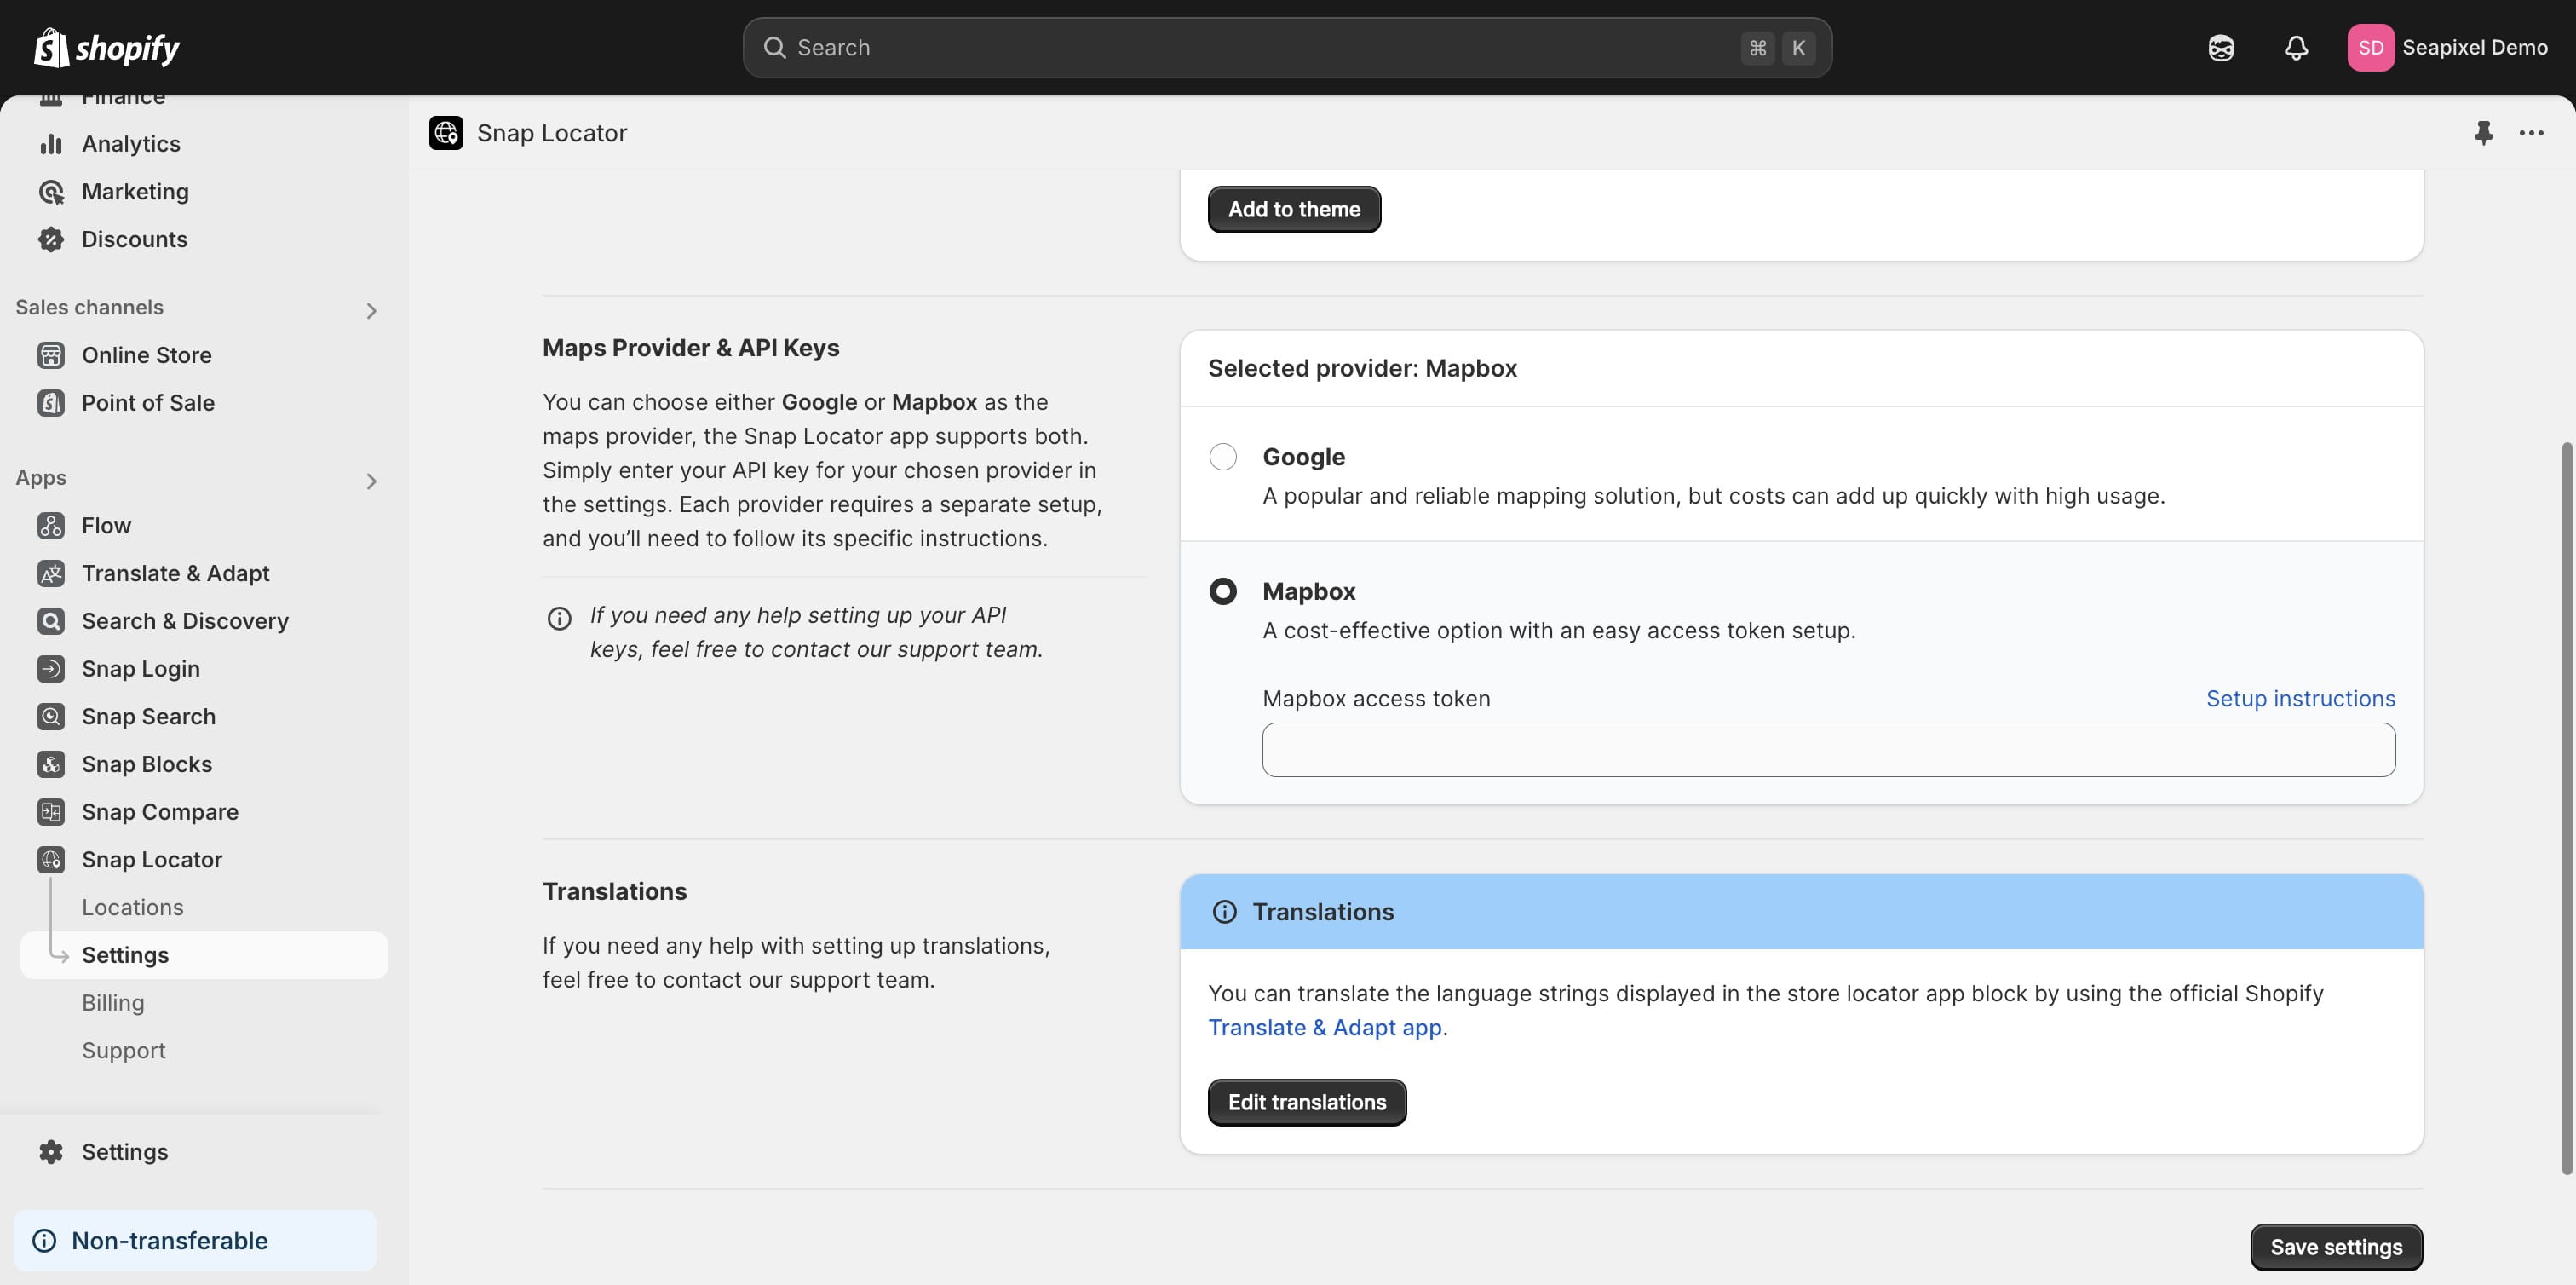
Paste your Access Token into the designated field and save the settings to apply the changes.
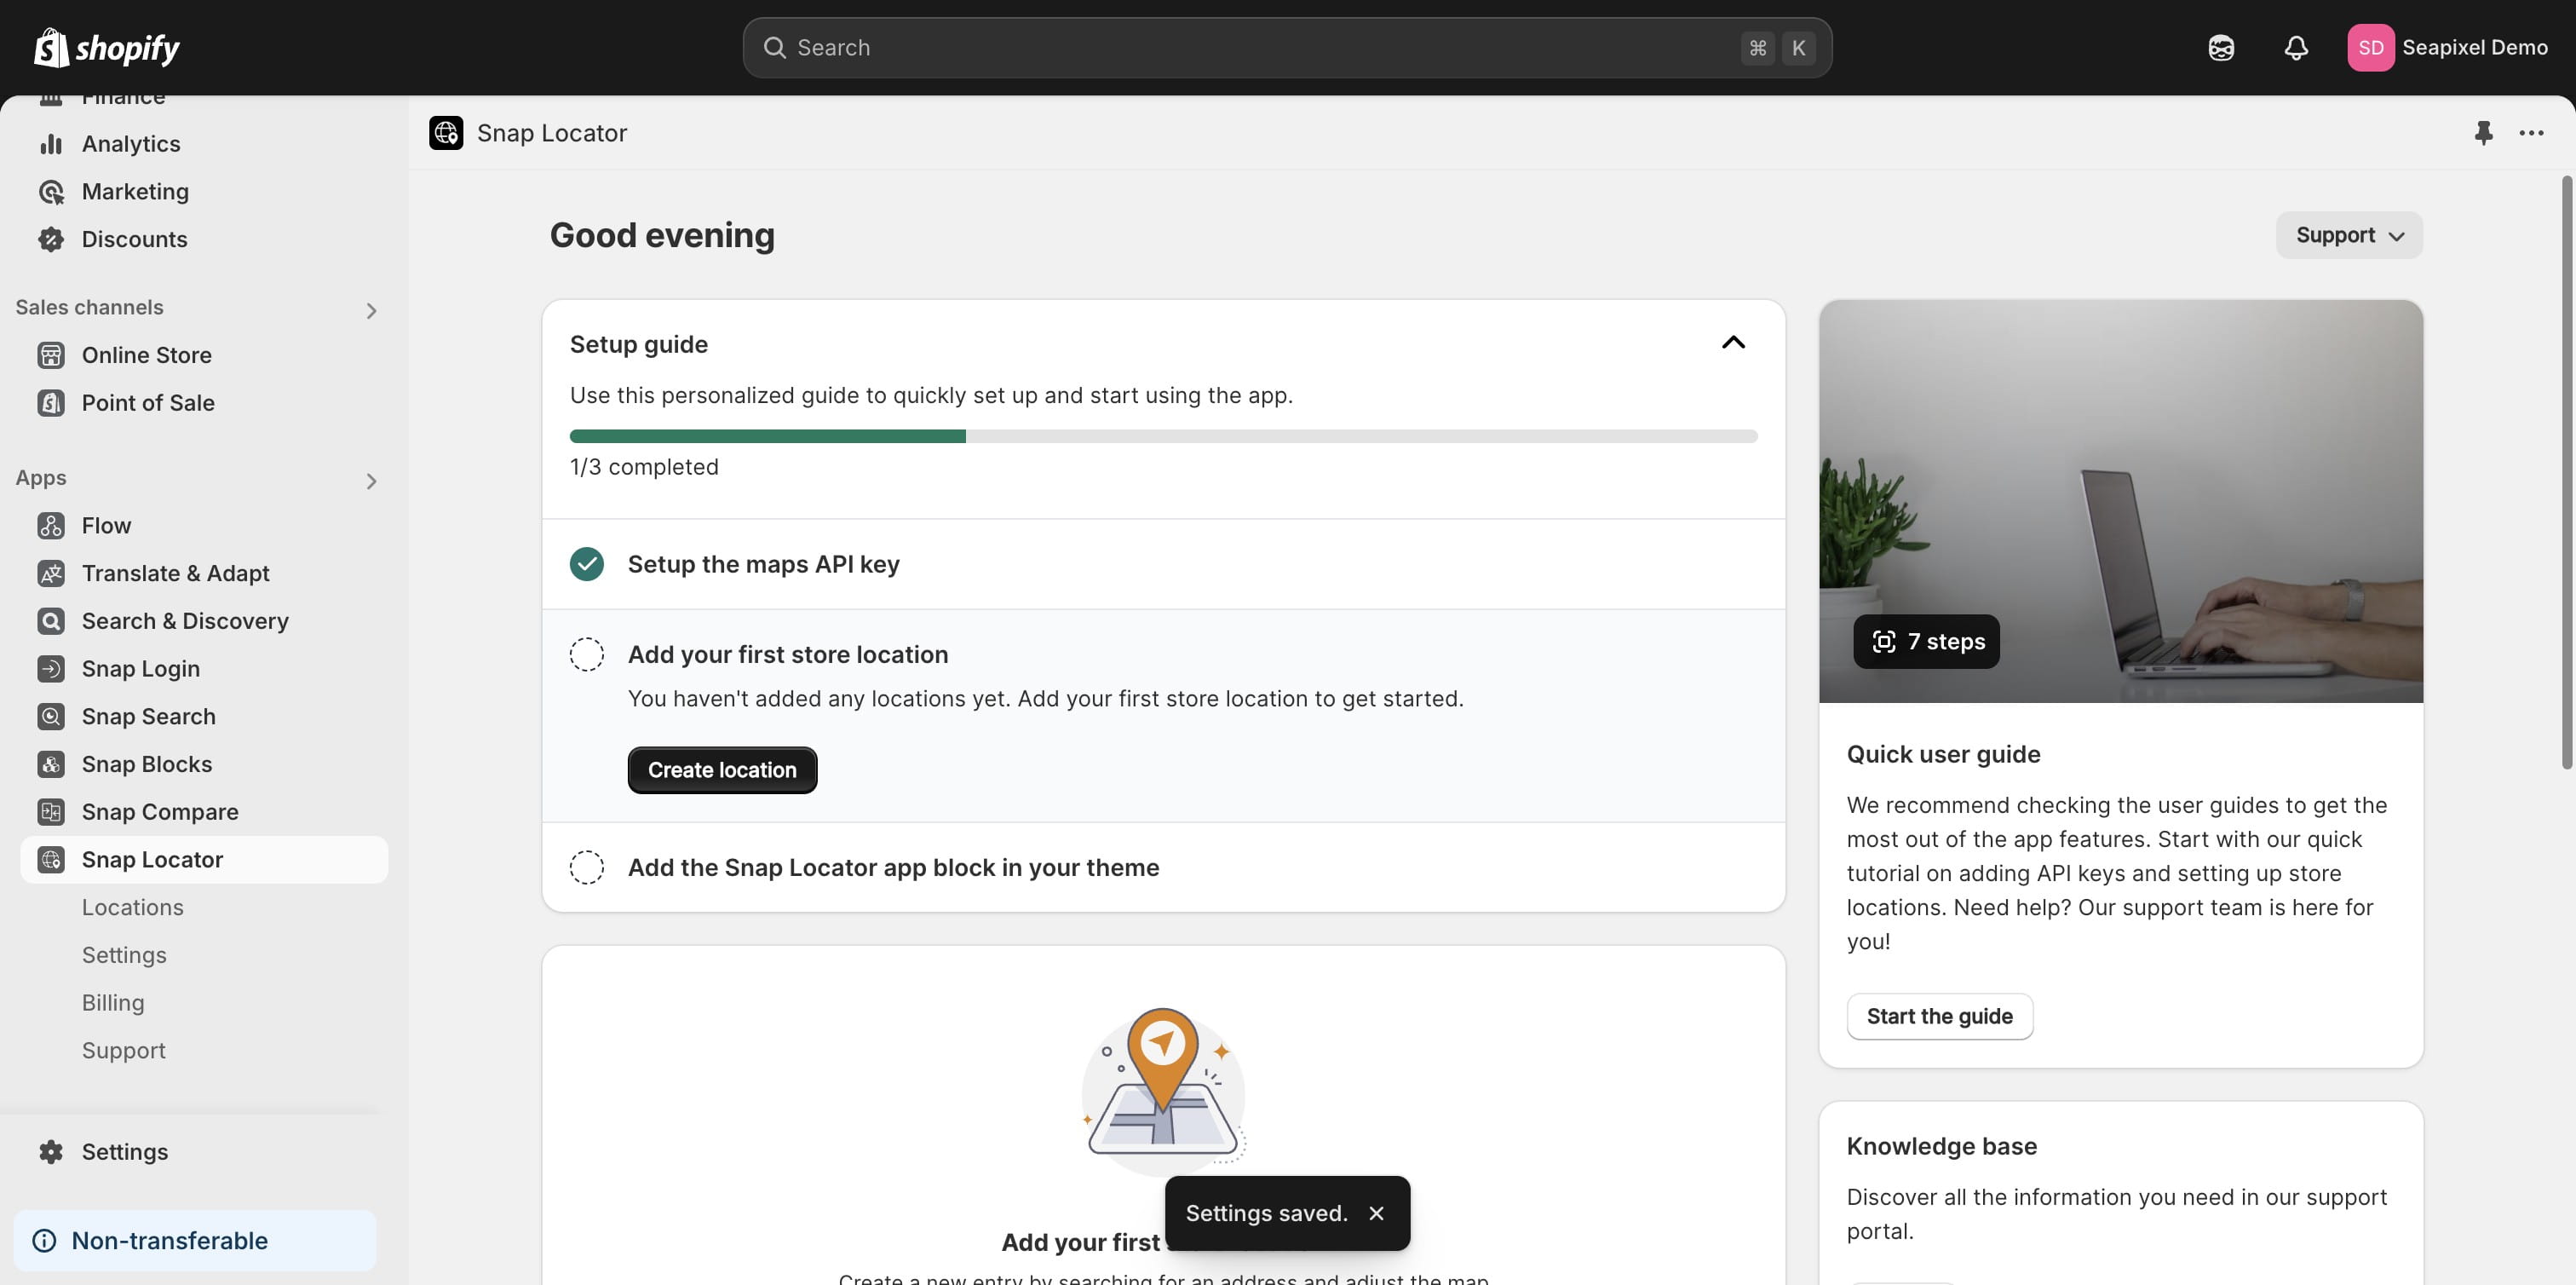
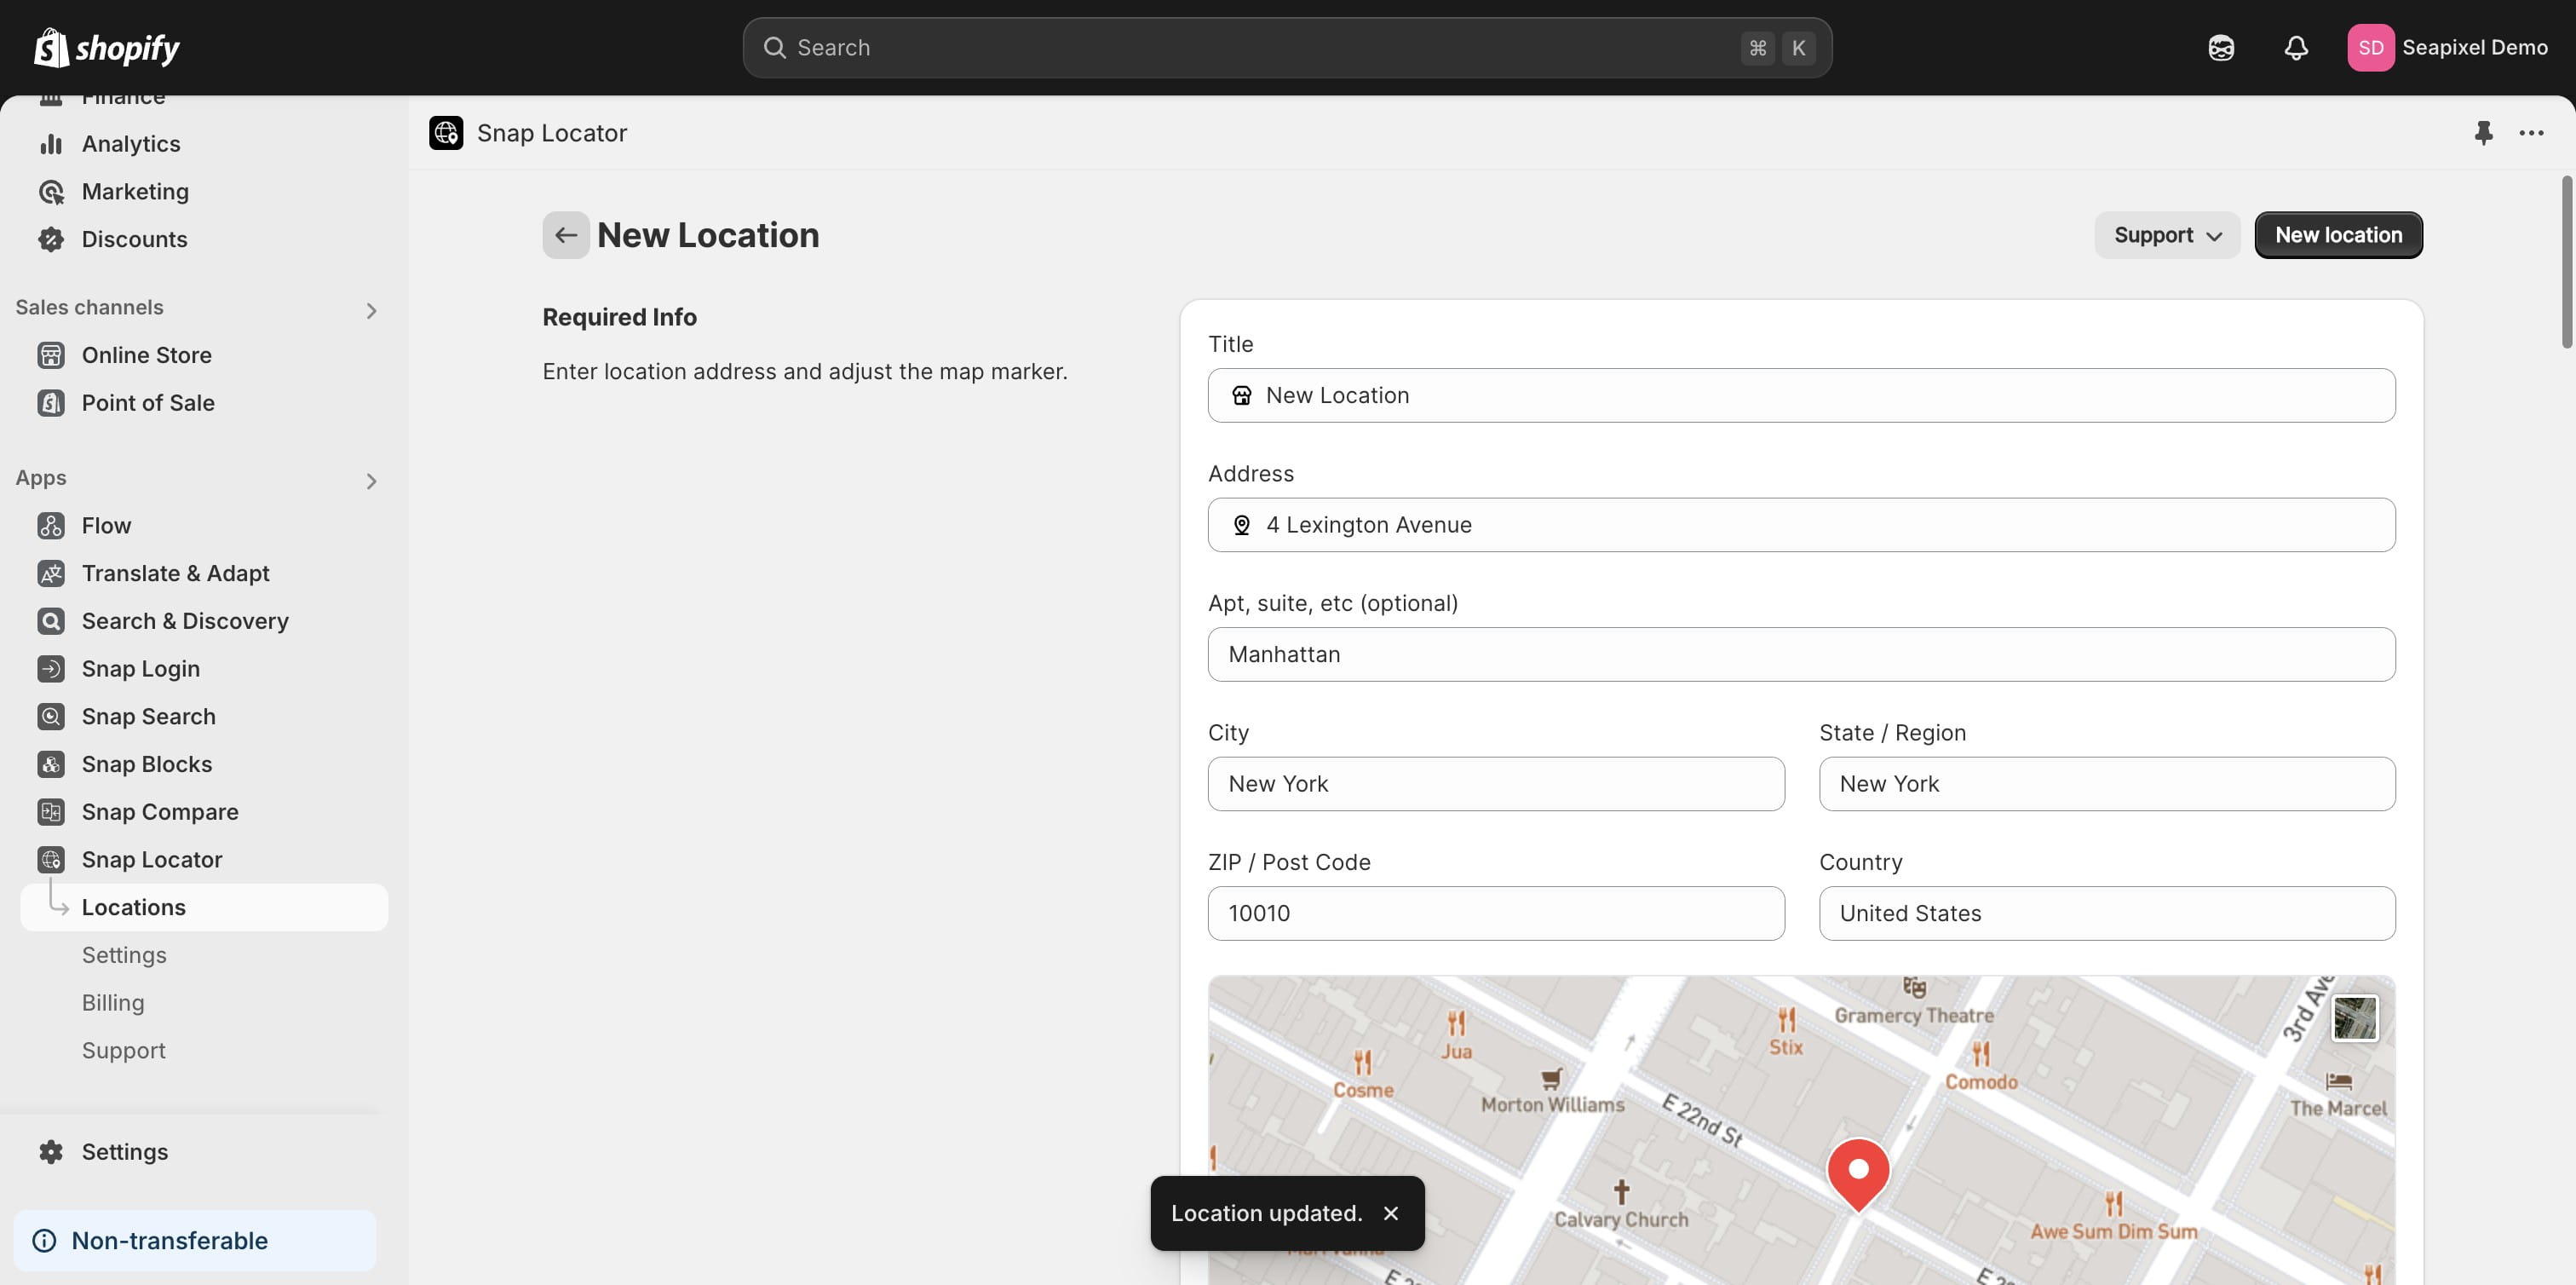
Let's begin by adding the first store location.
Provide a descriptive name for the location.
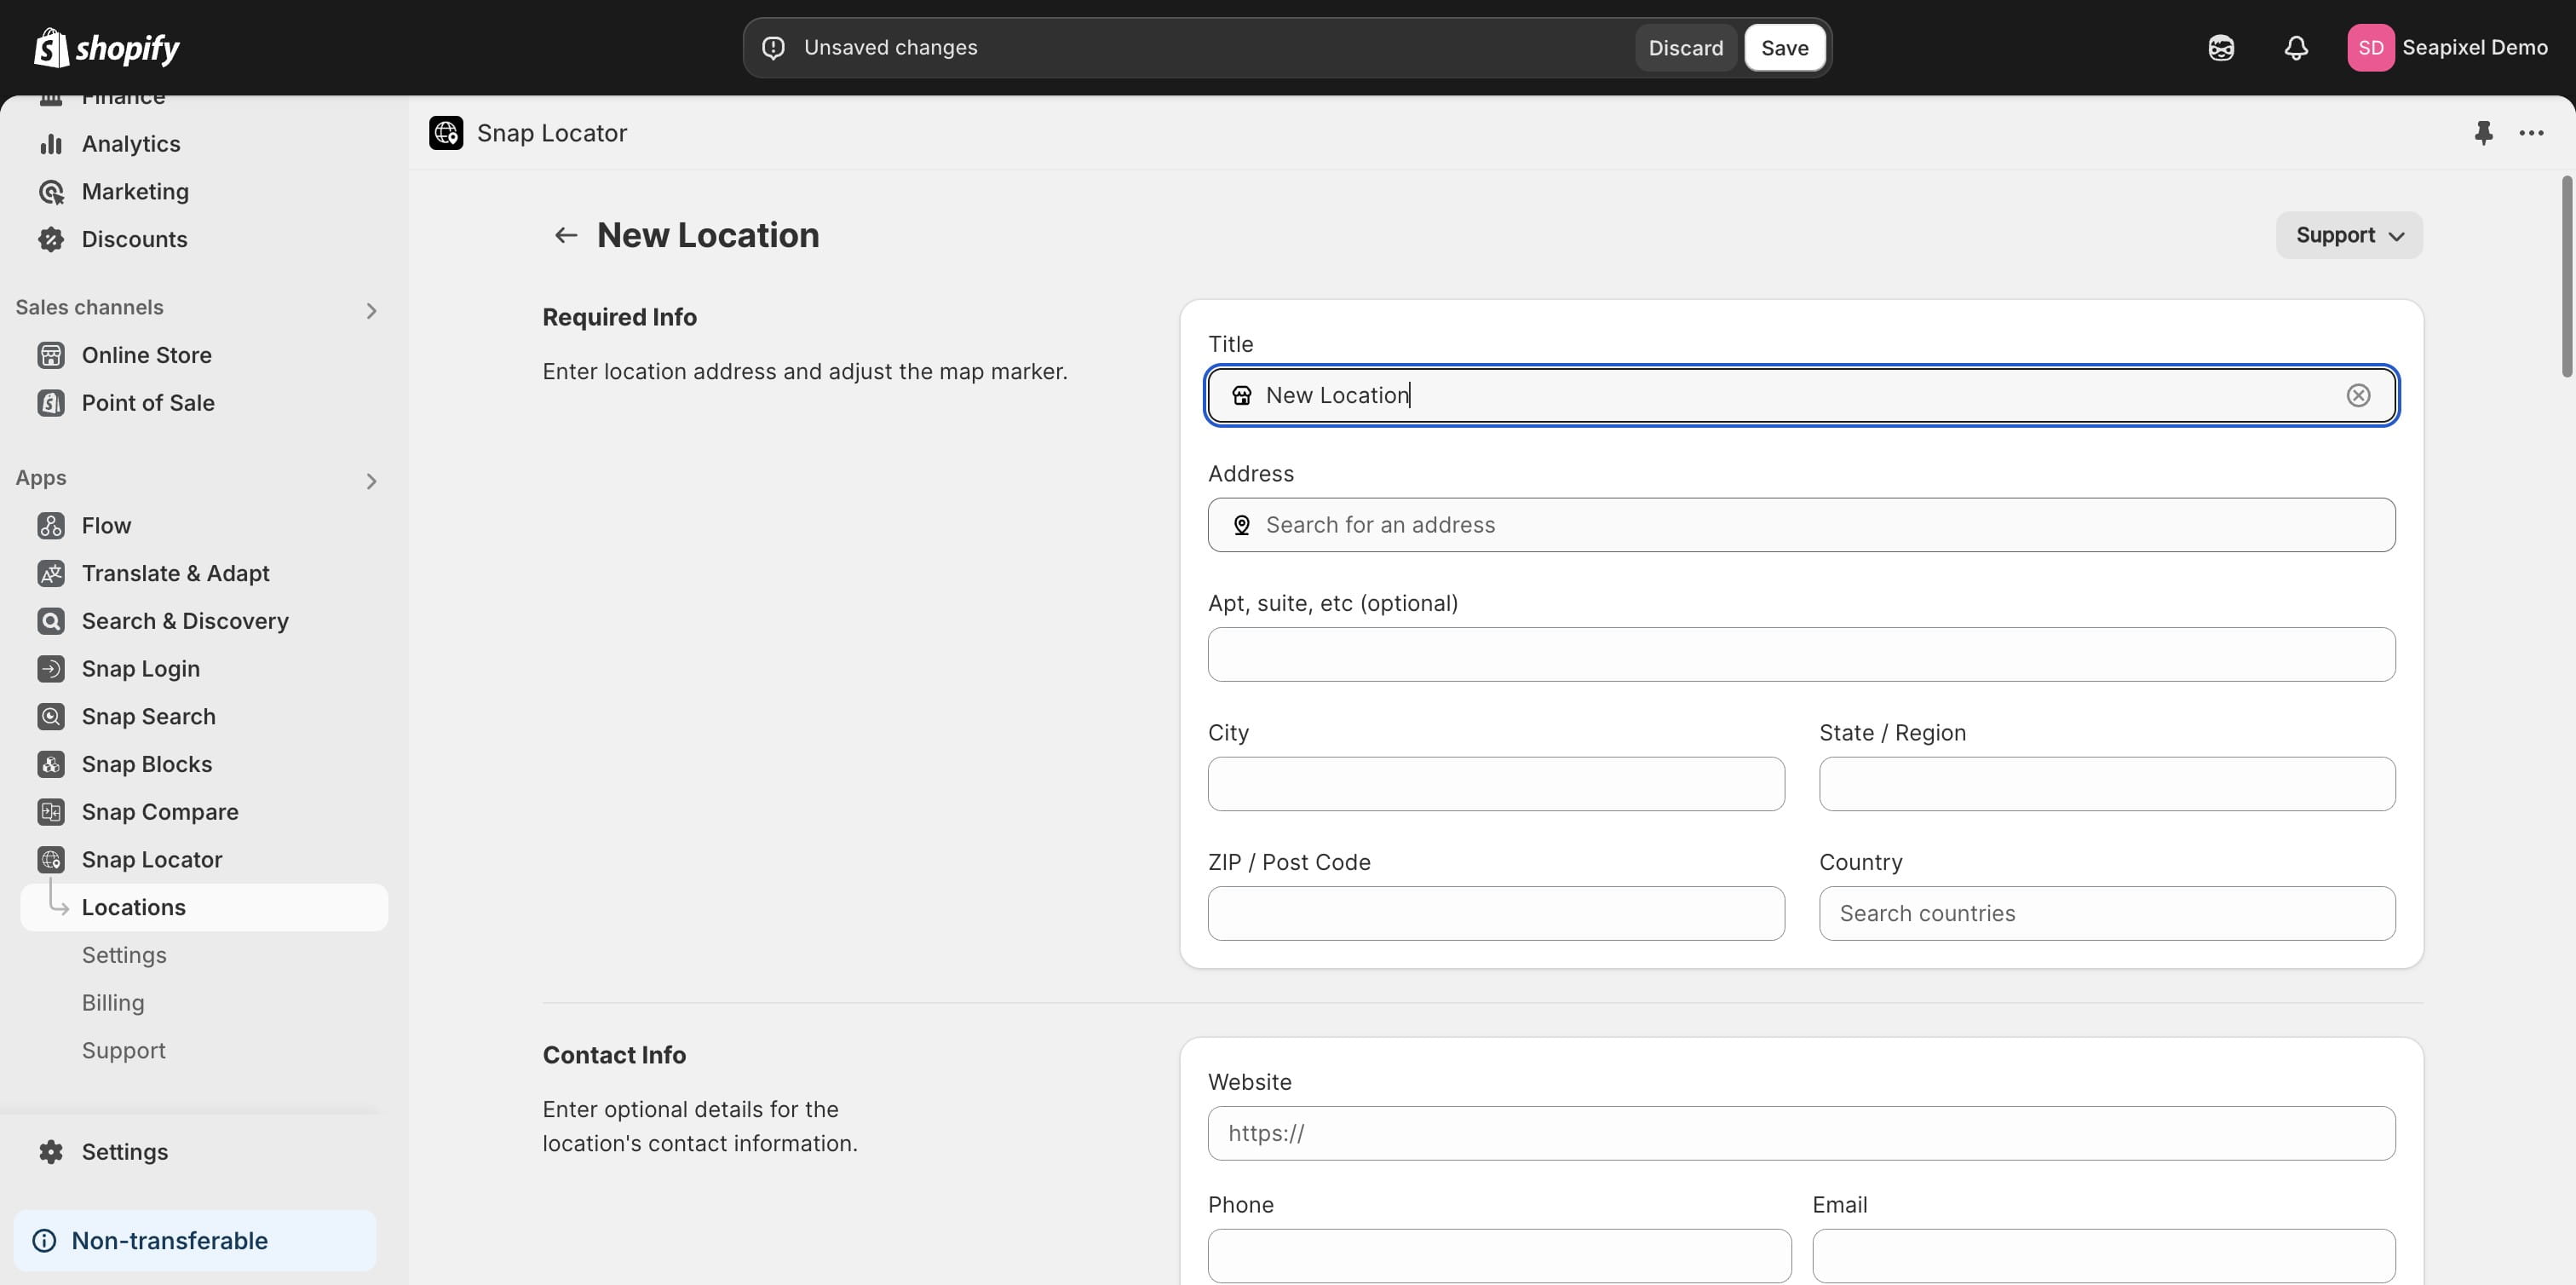
Enter the location address by searching using the app's autocomplete input field.
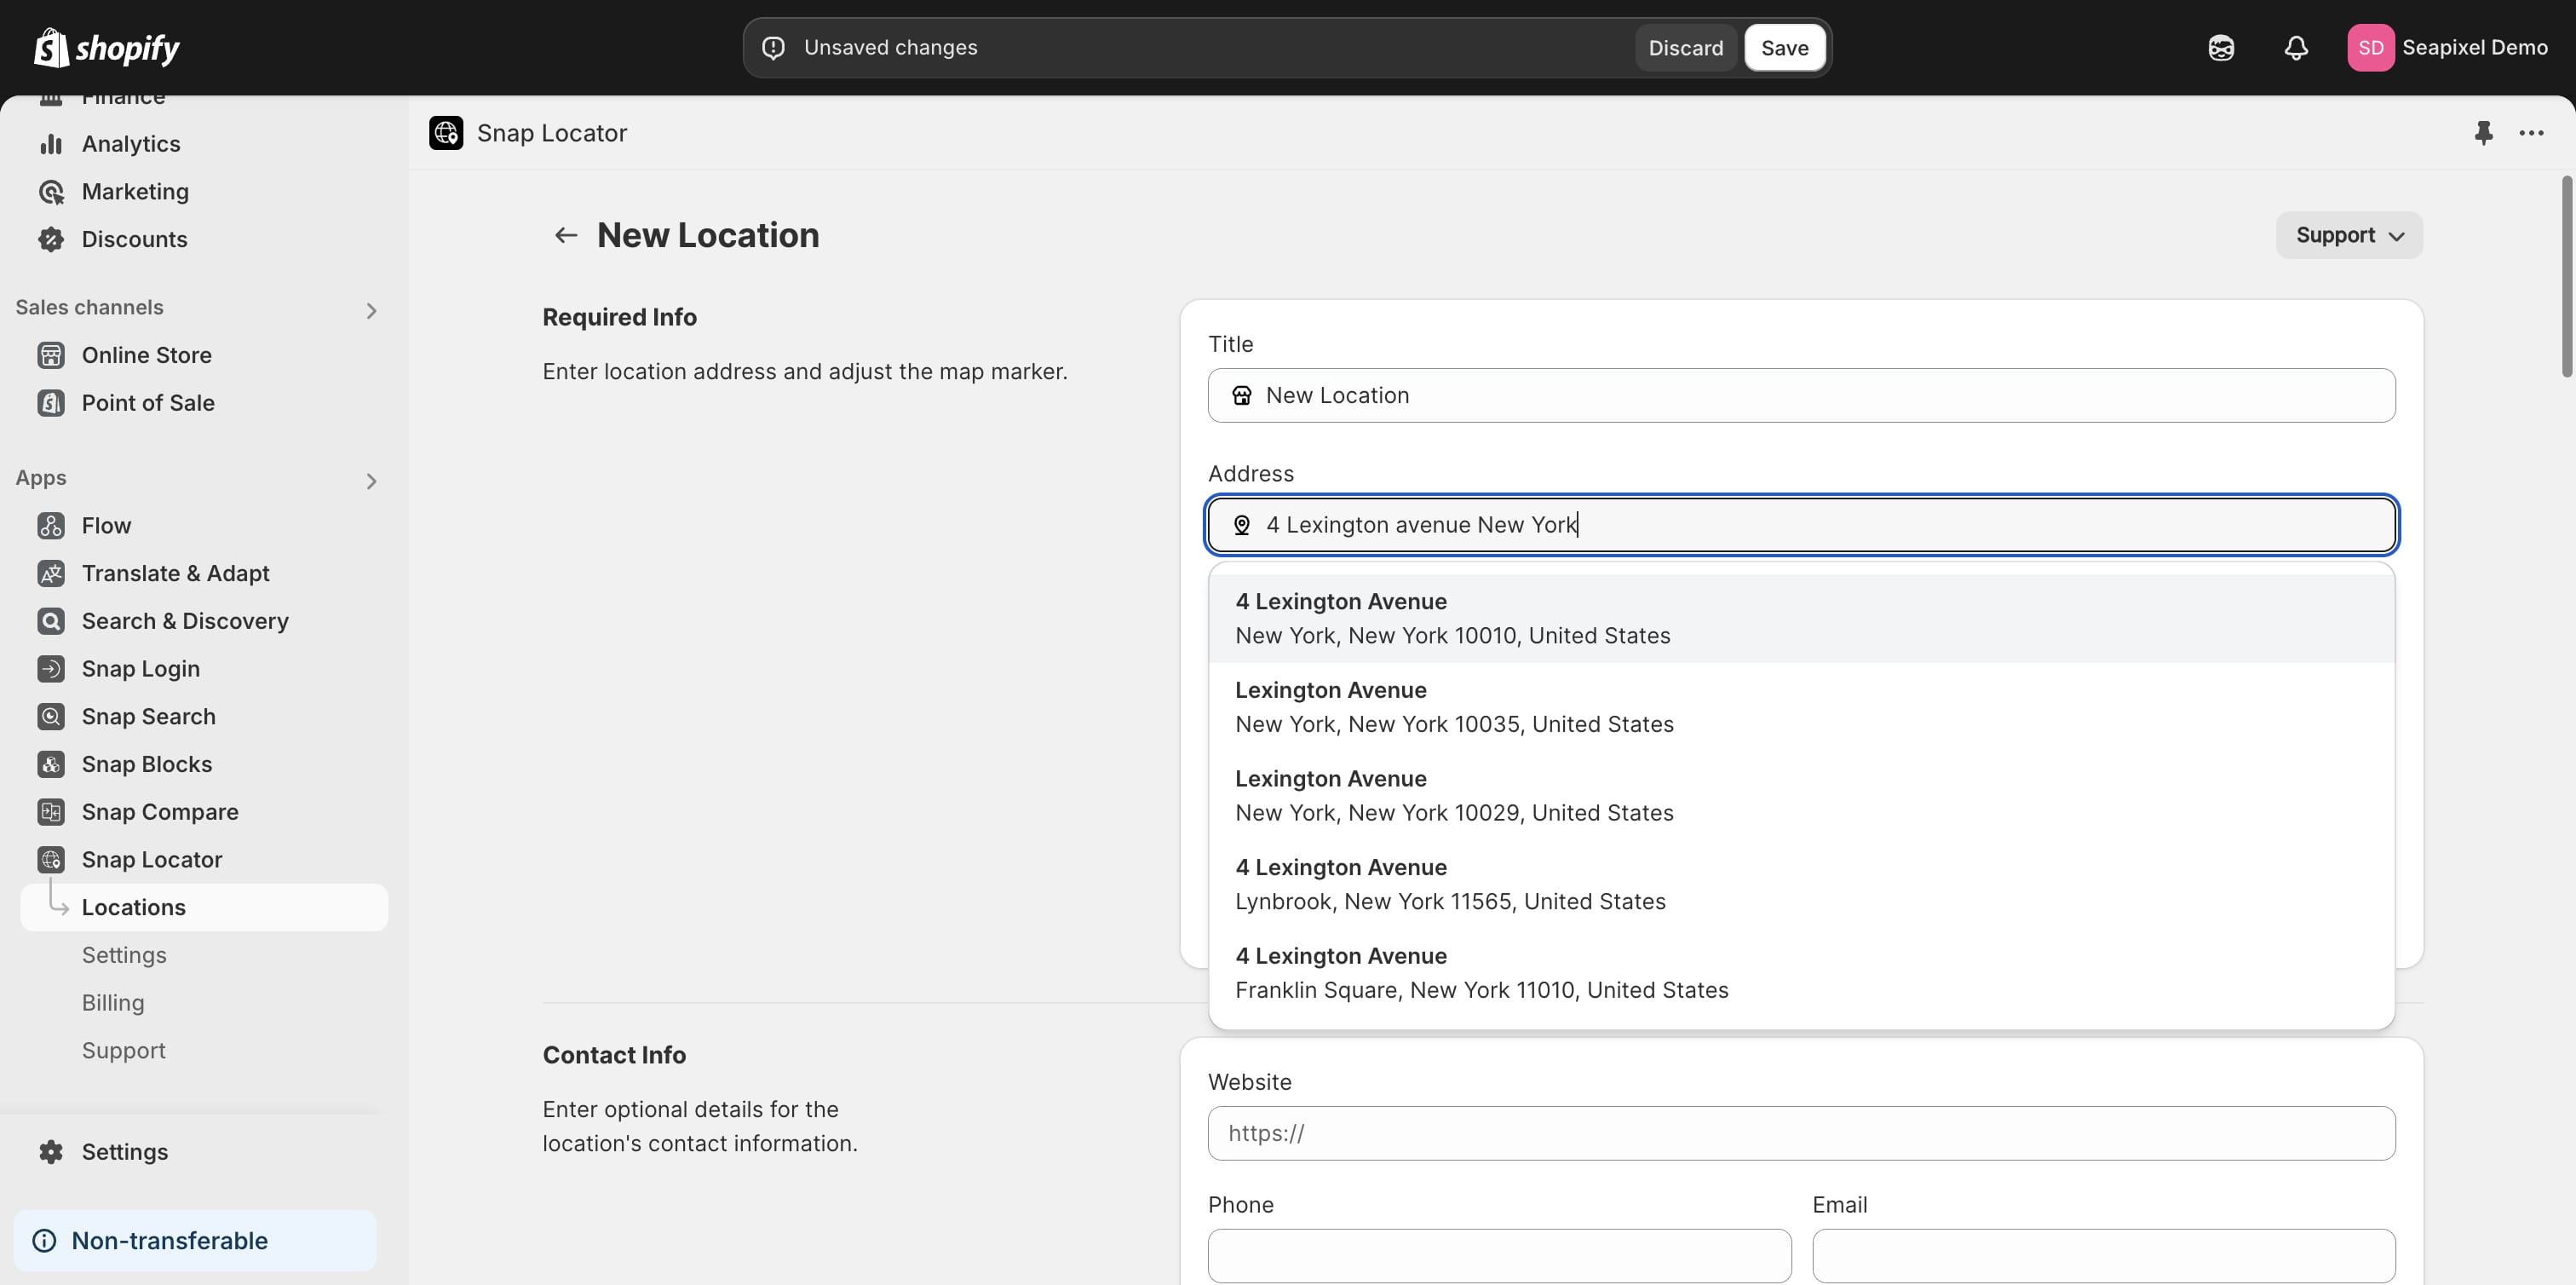
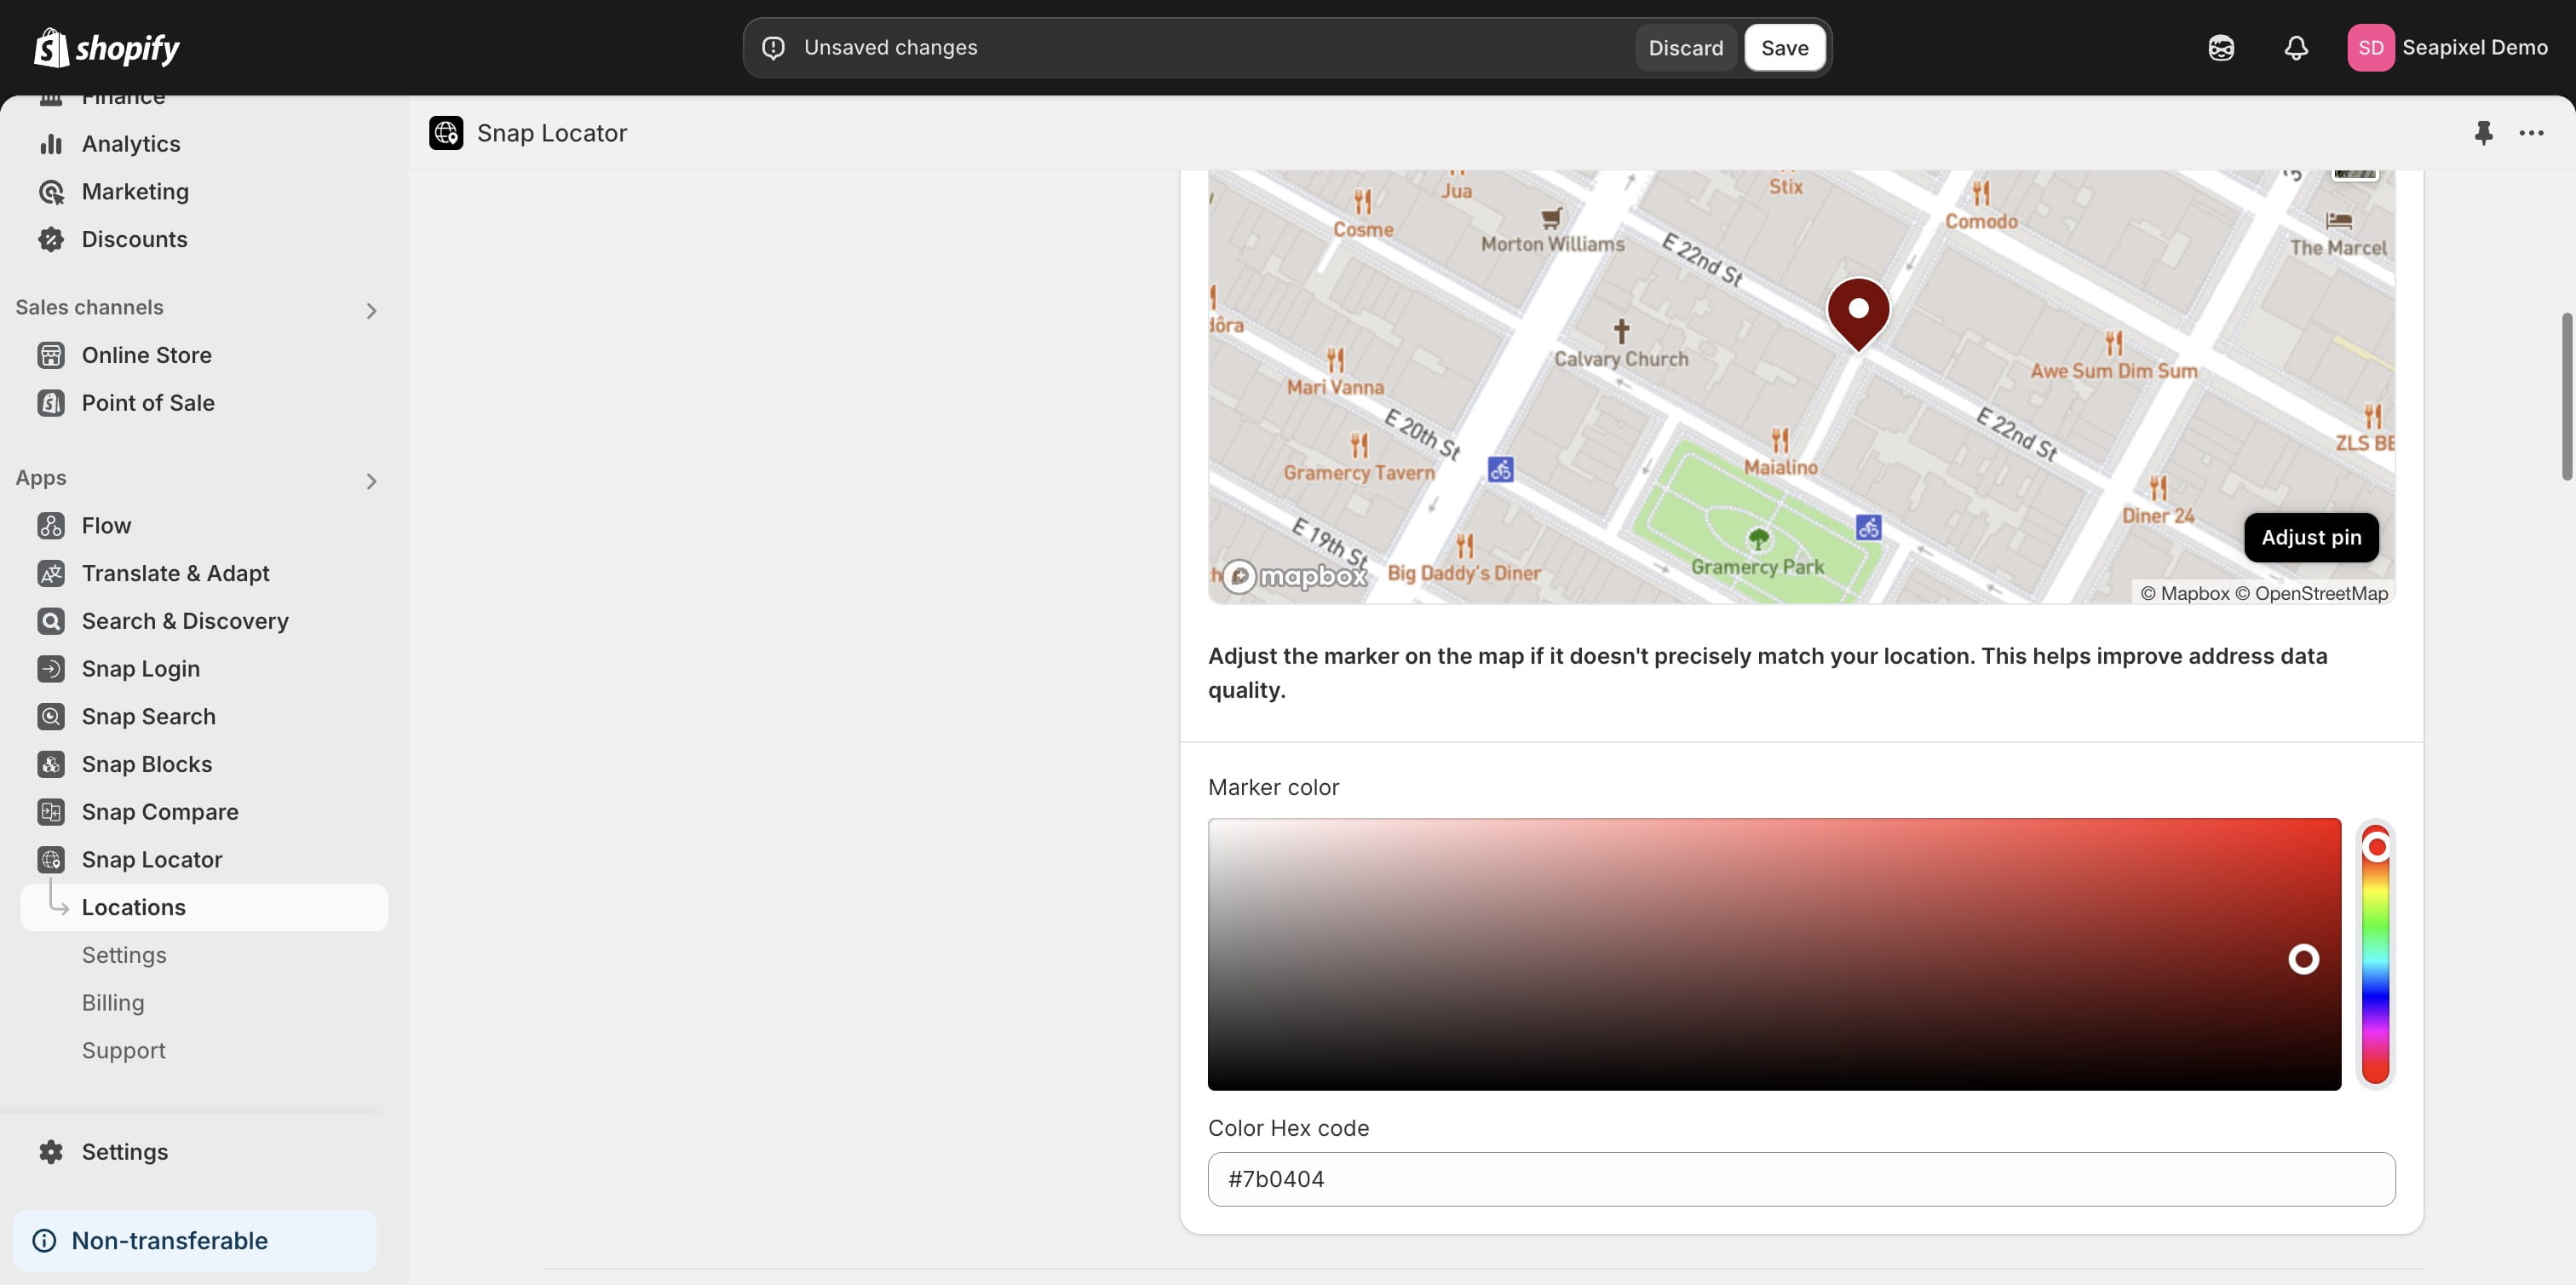
If necessary, adjust the pin to ensure proper alignment.
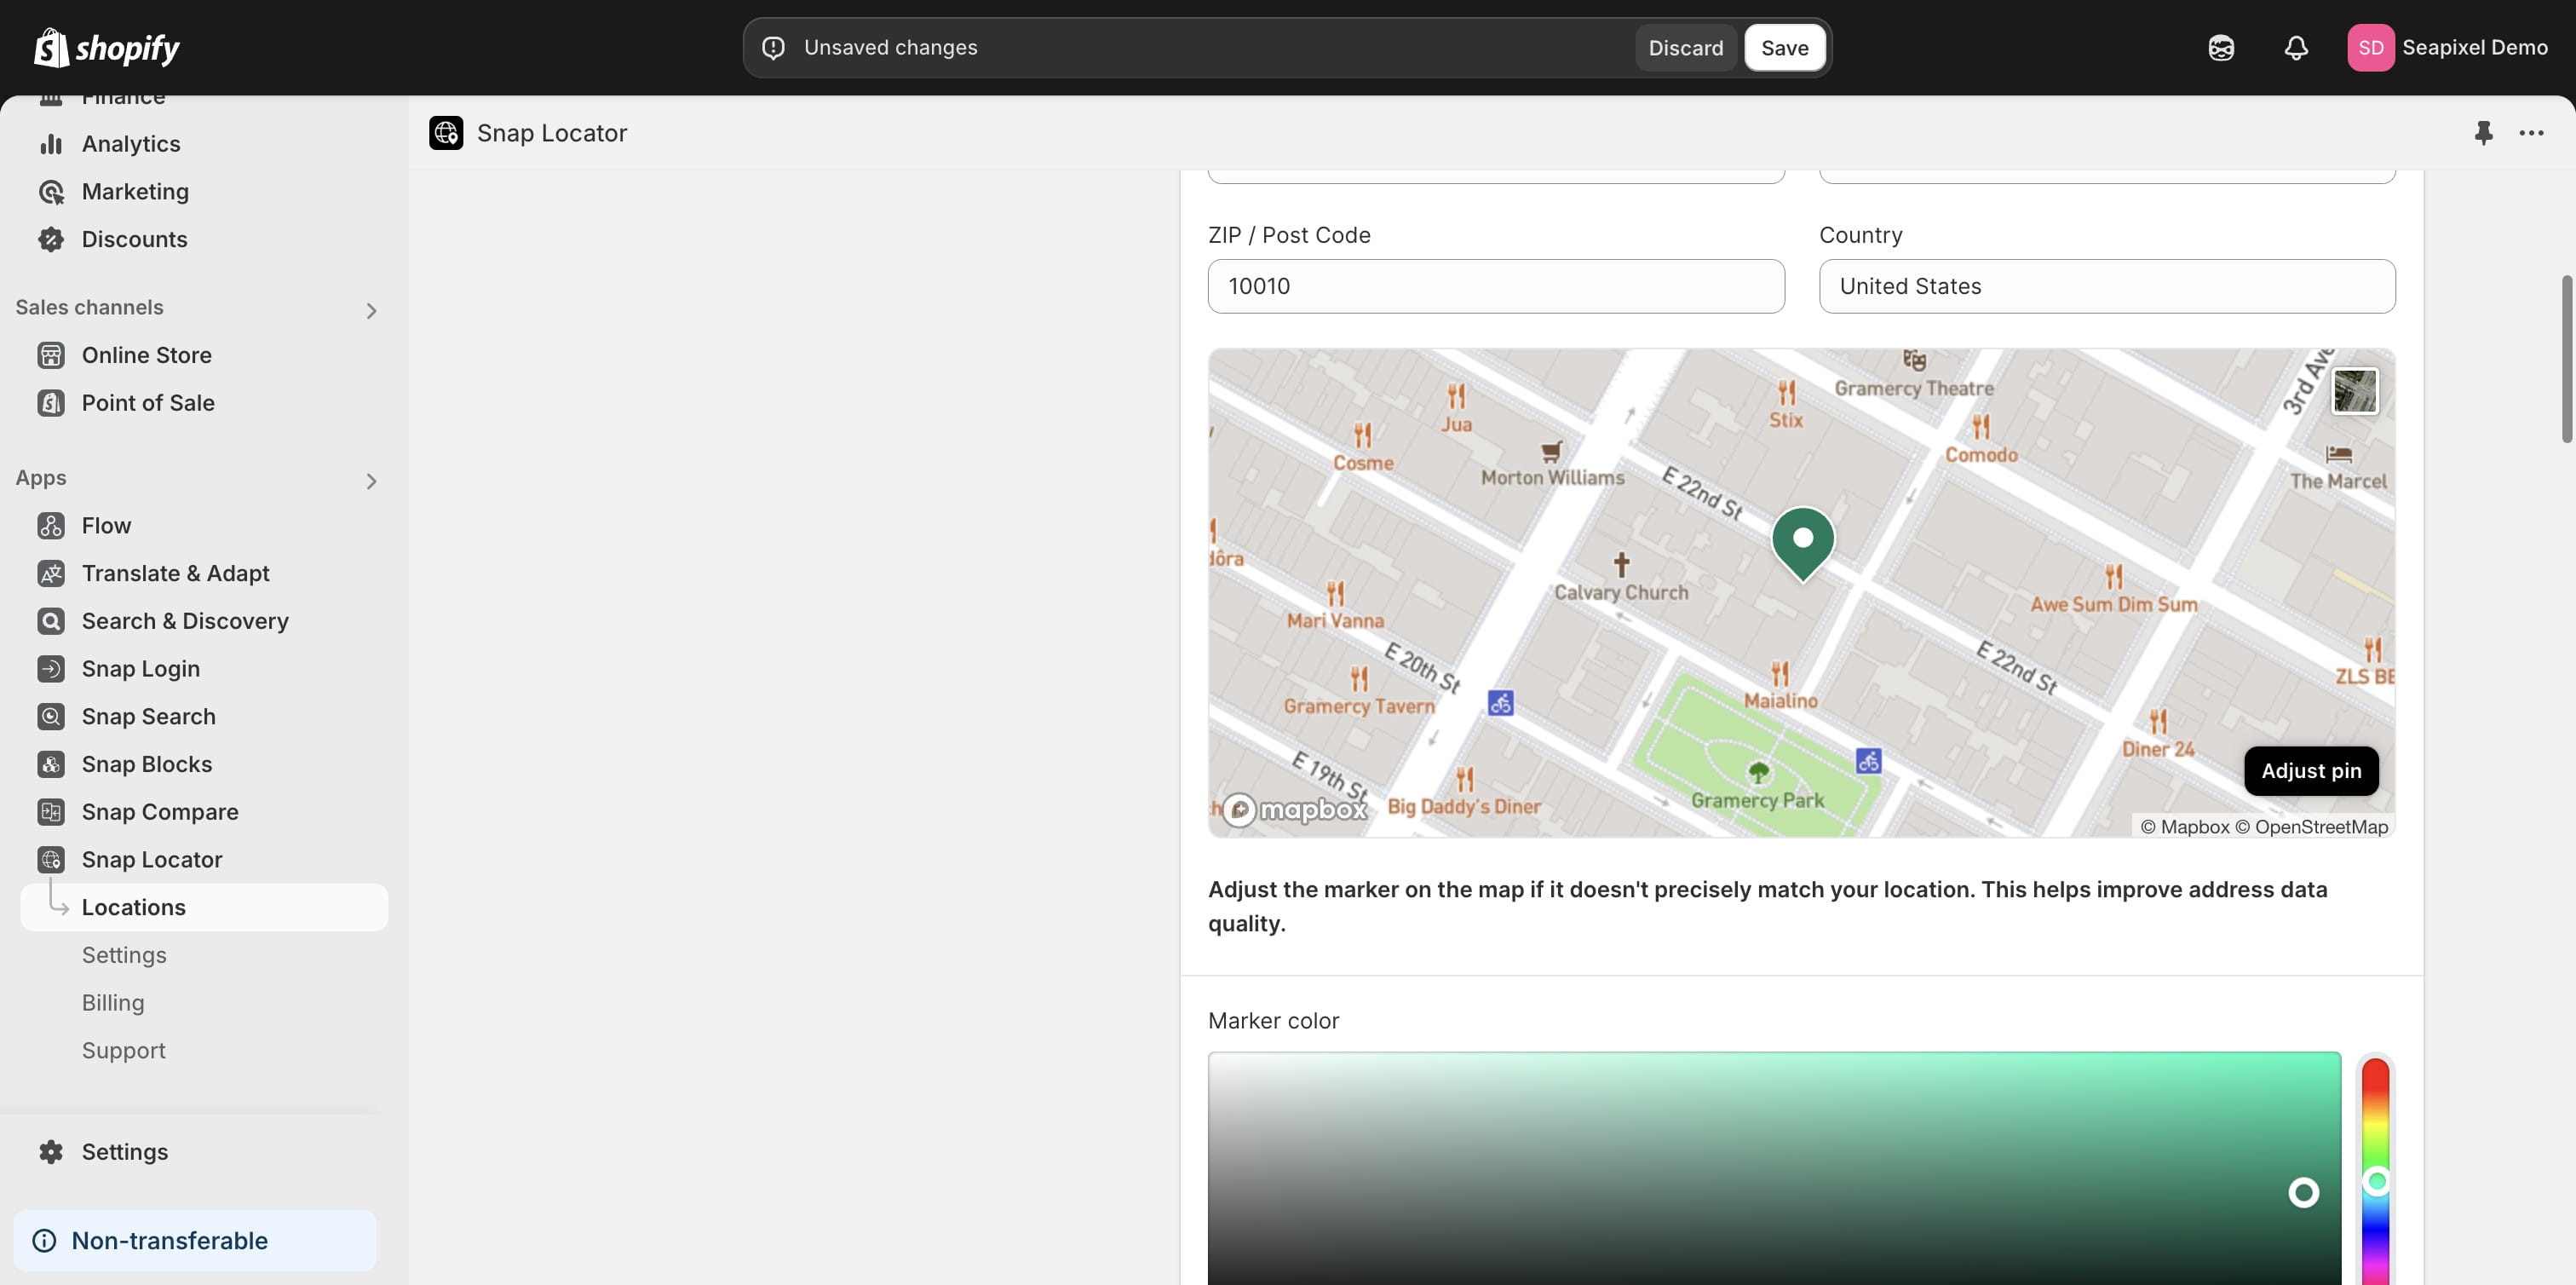
Additionally, you have the option to customize the pin color.
Proceed with the remaining details and information.
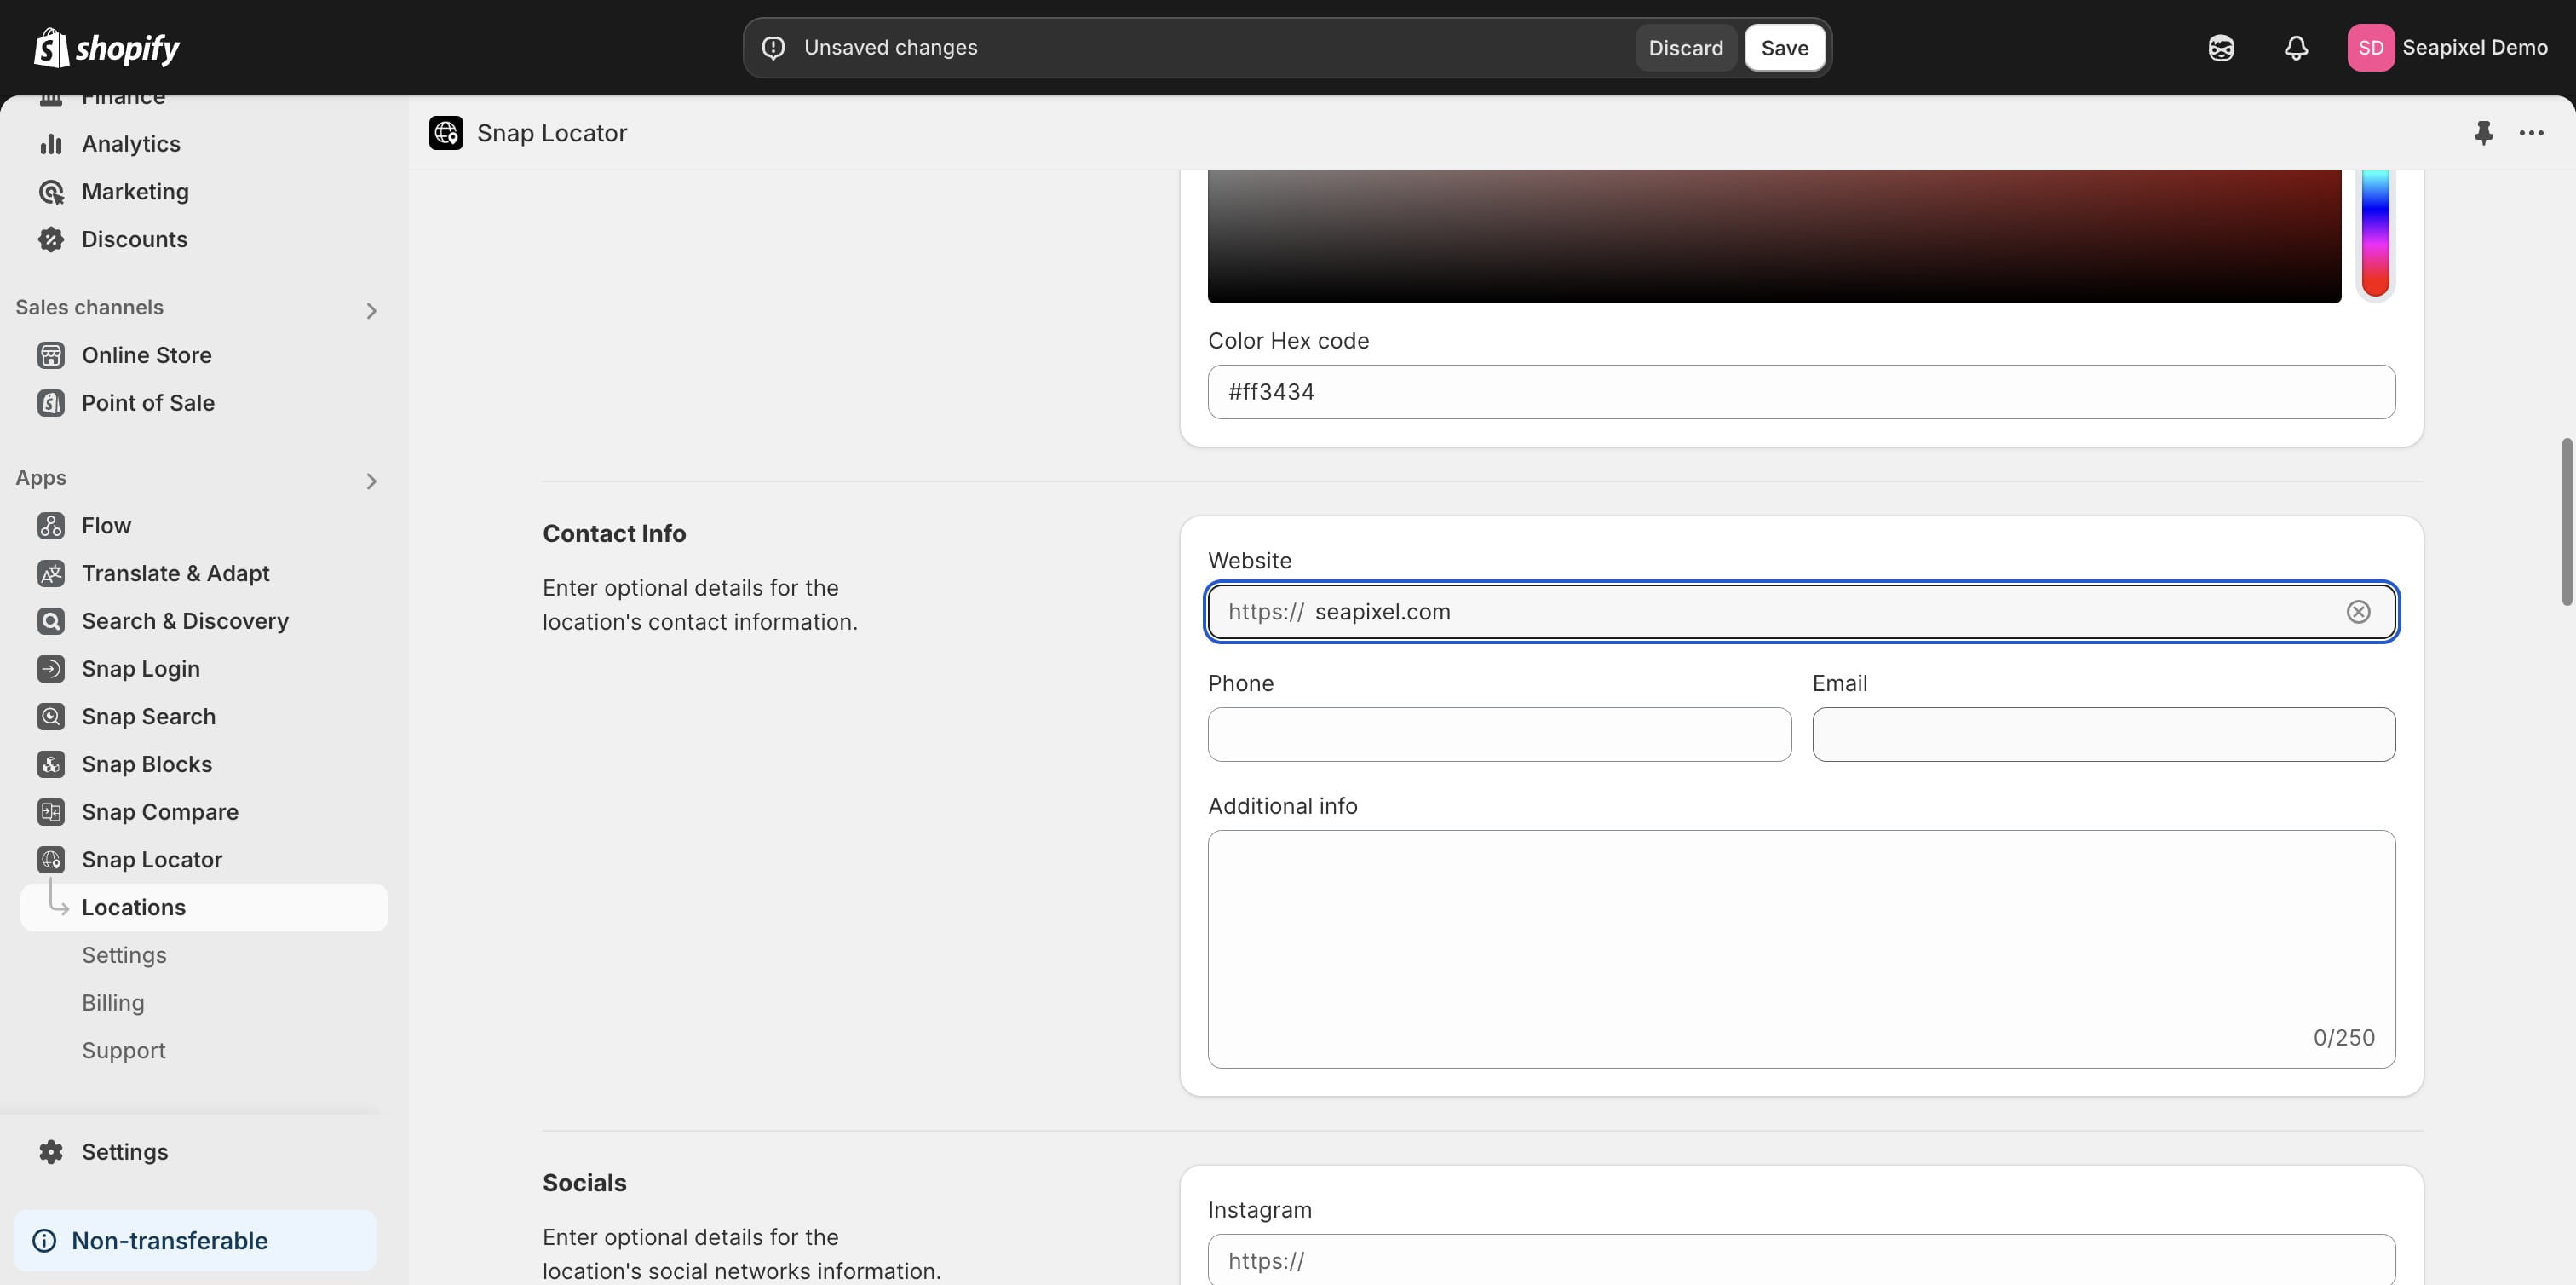
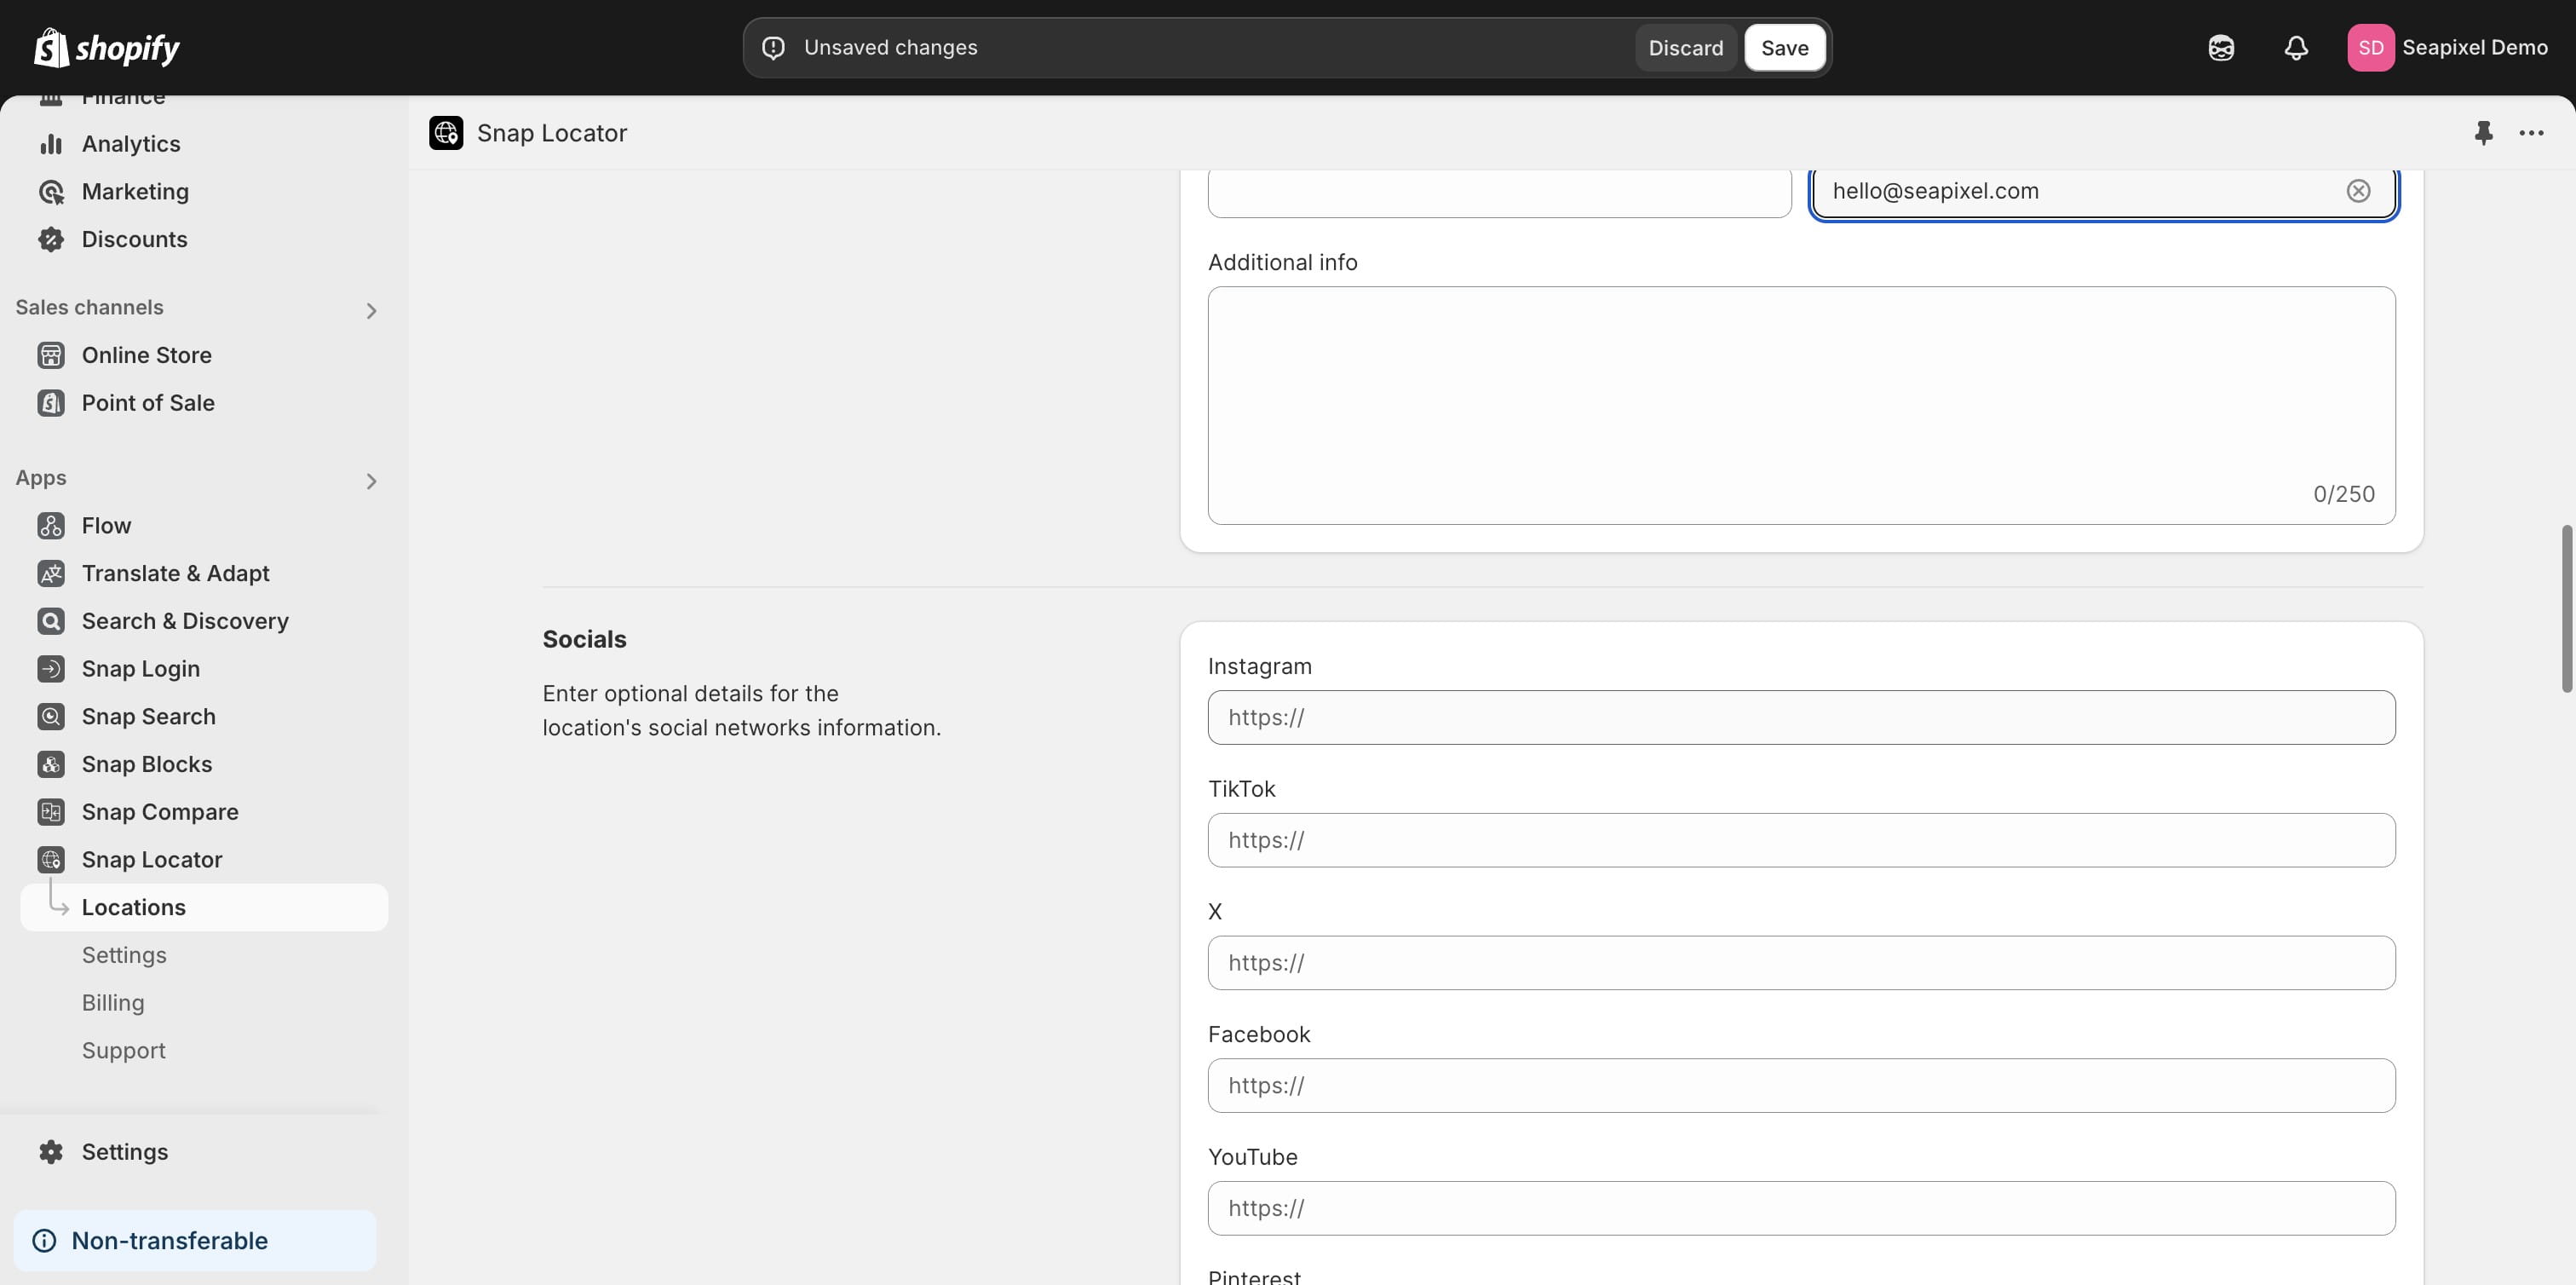
You can also provide additional information, such as links to social media profiles.
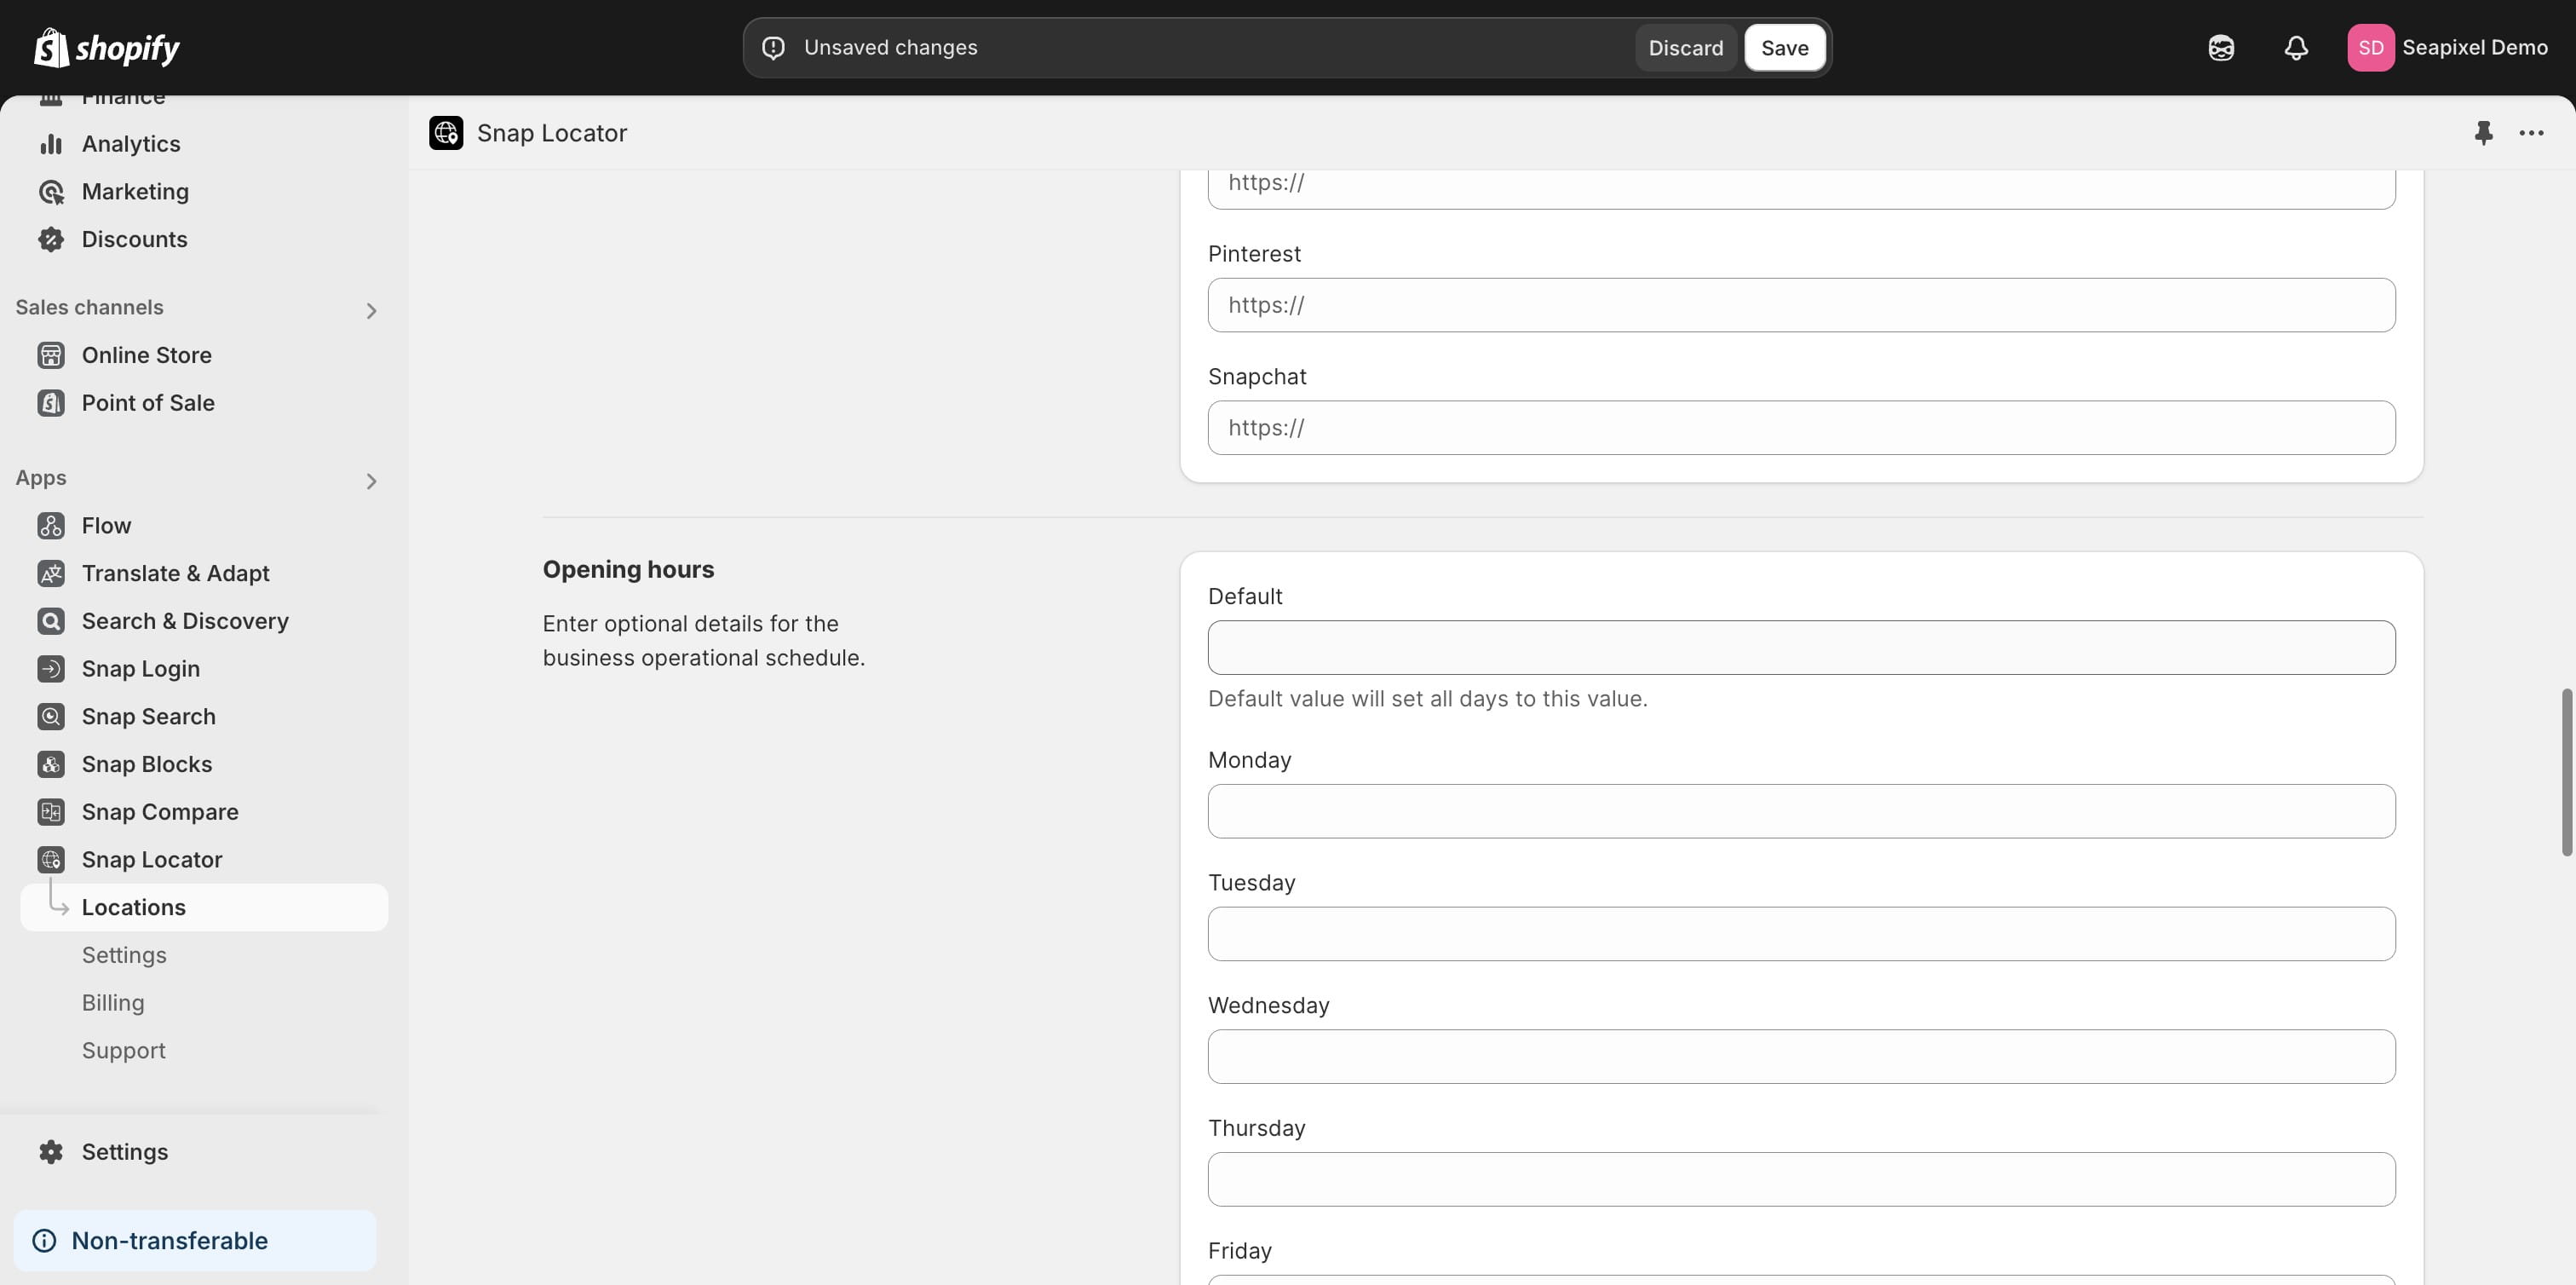
You can provide the operational hours for the location.
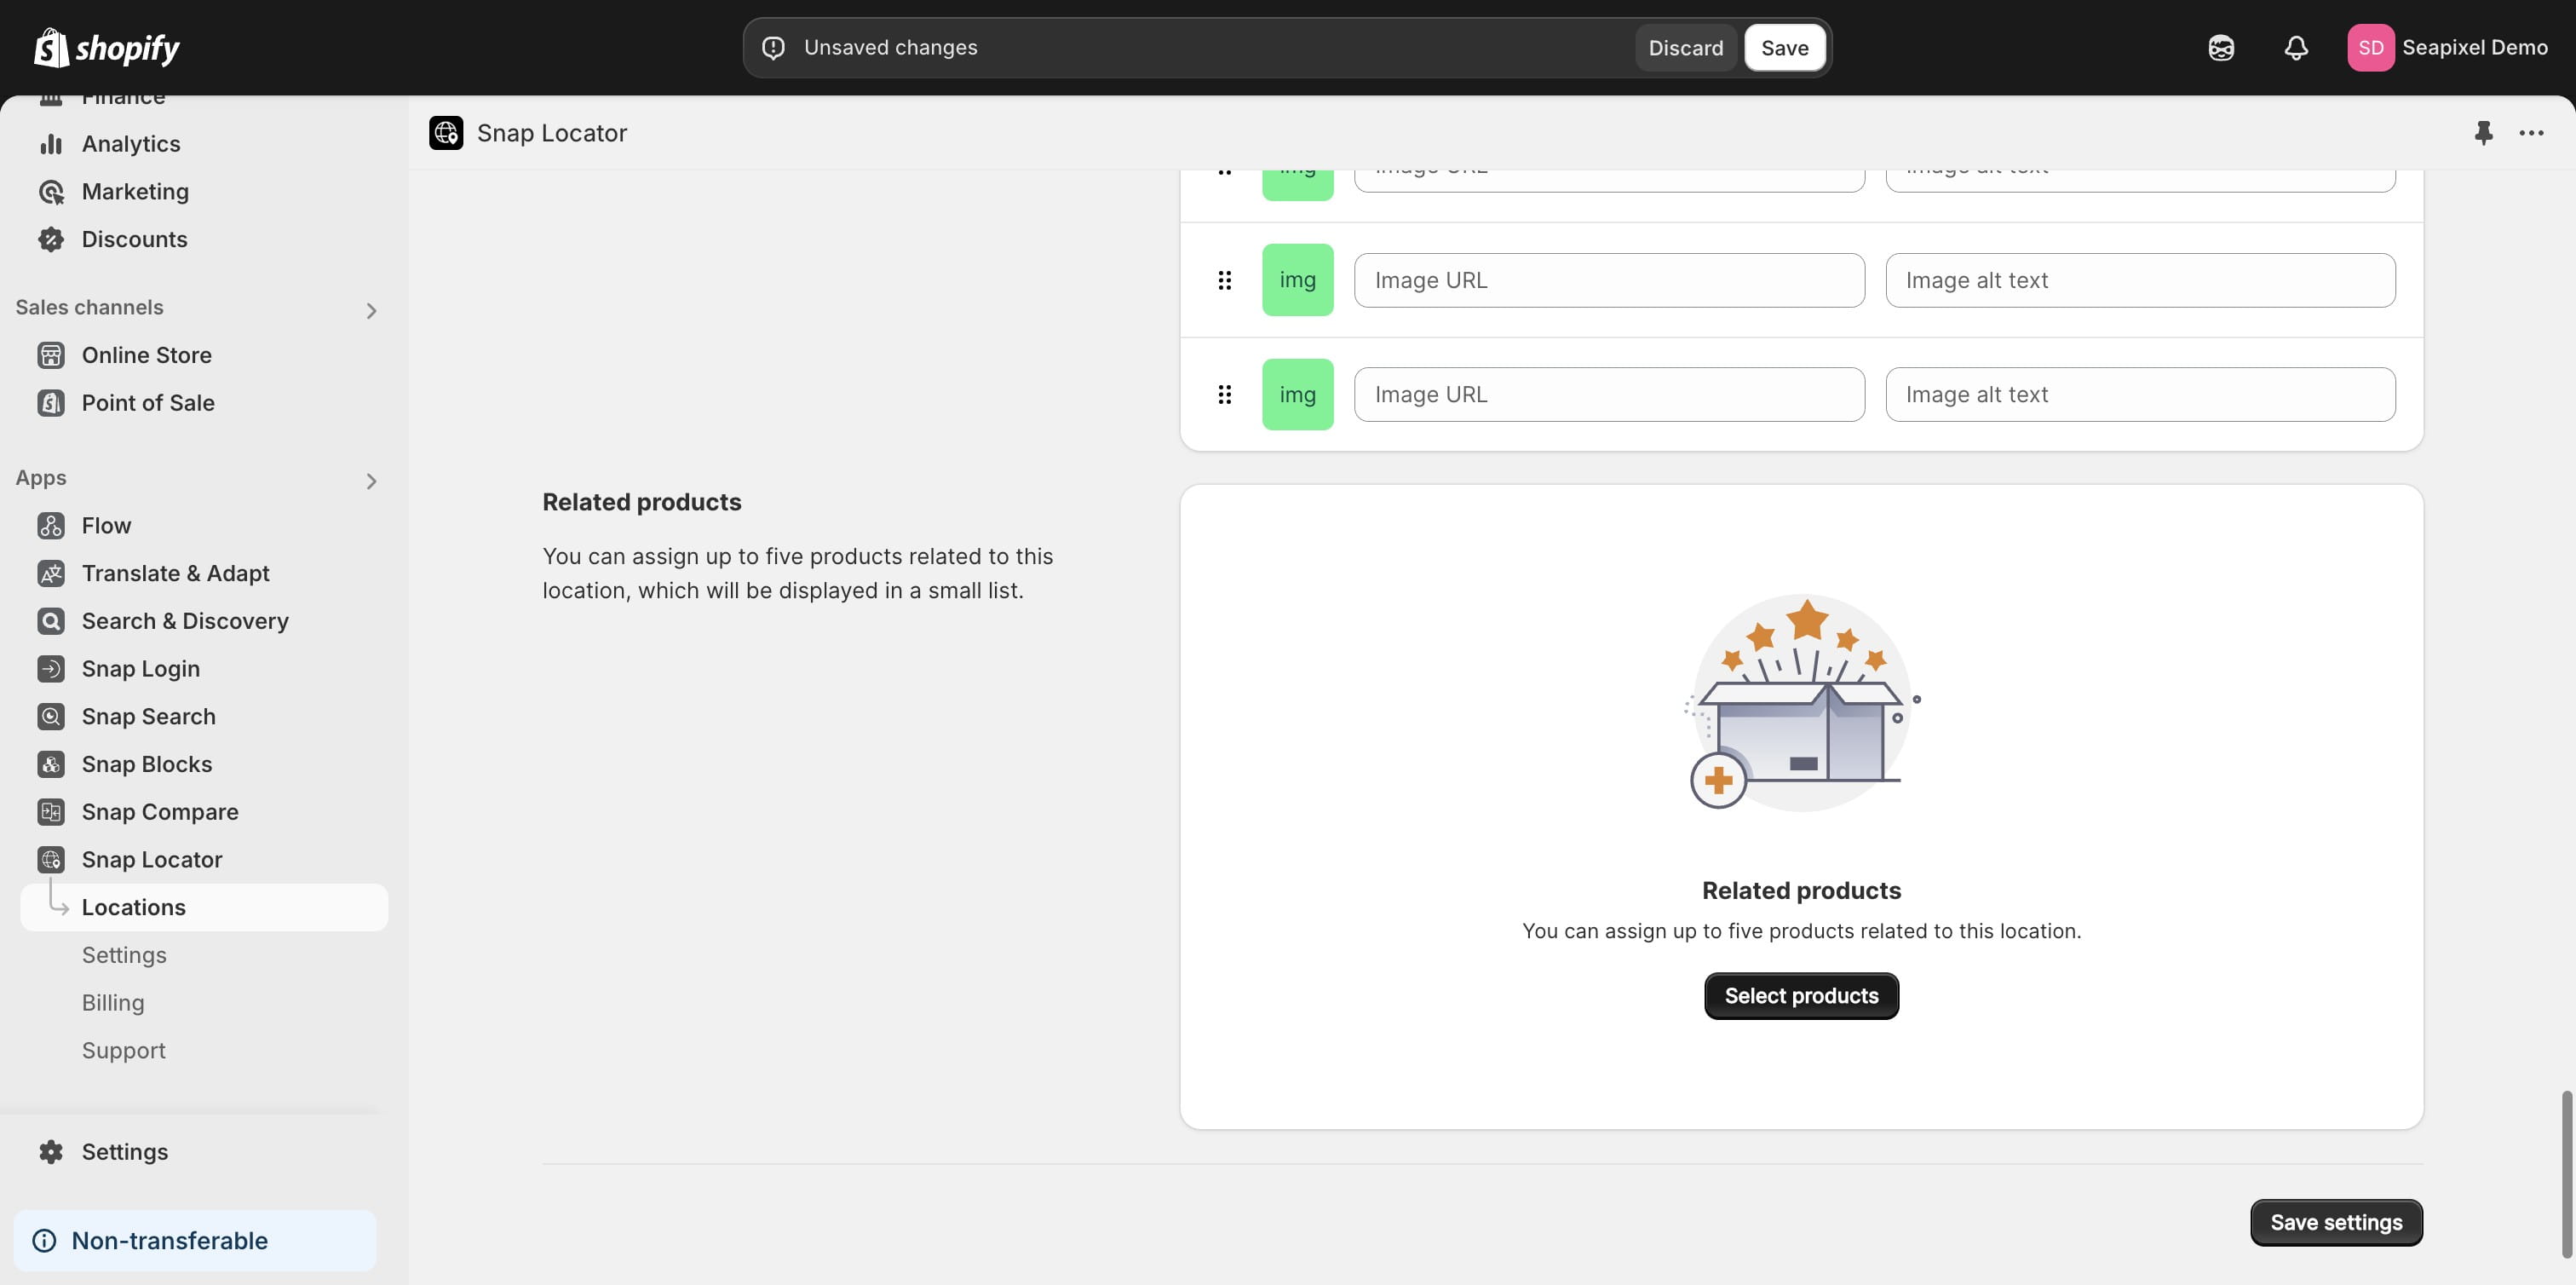
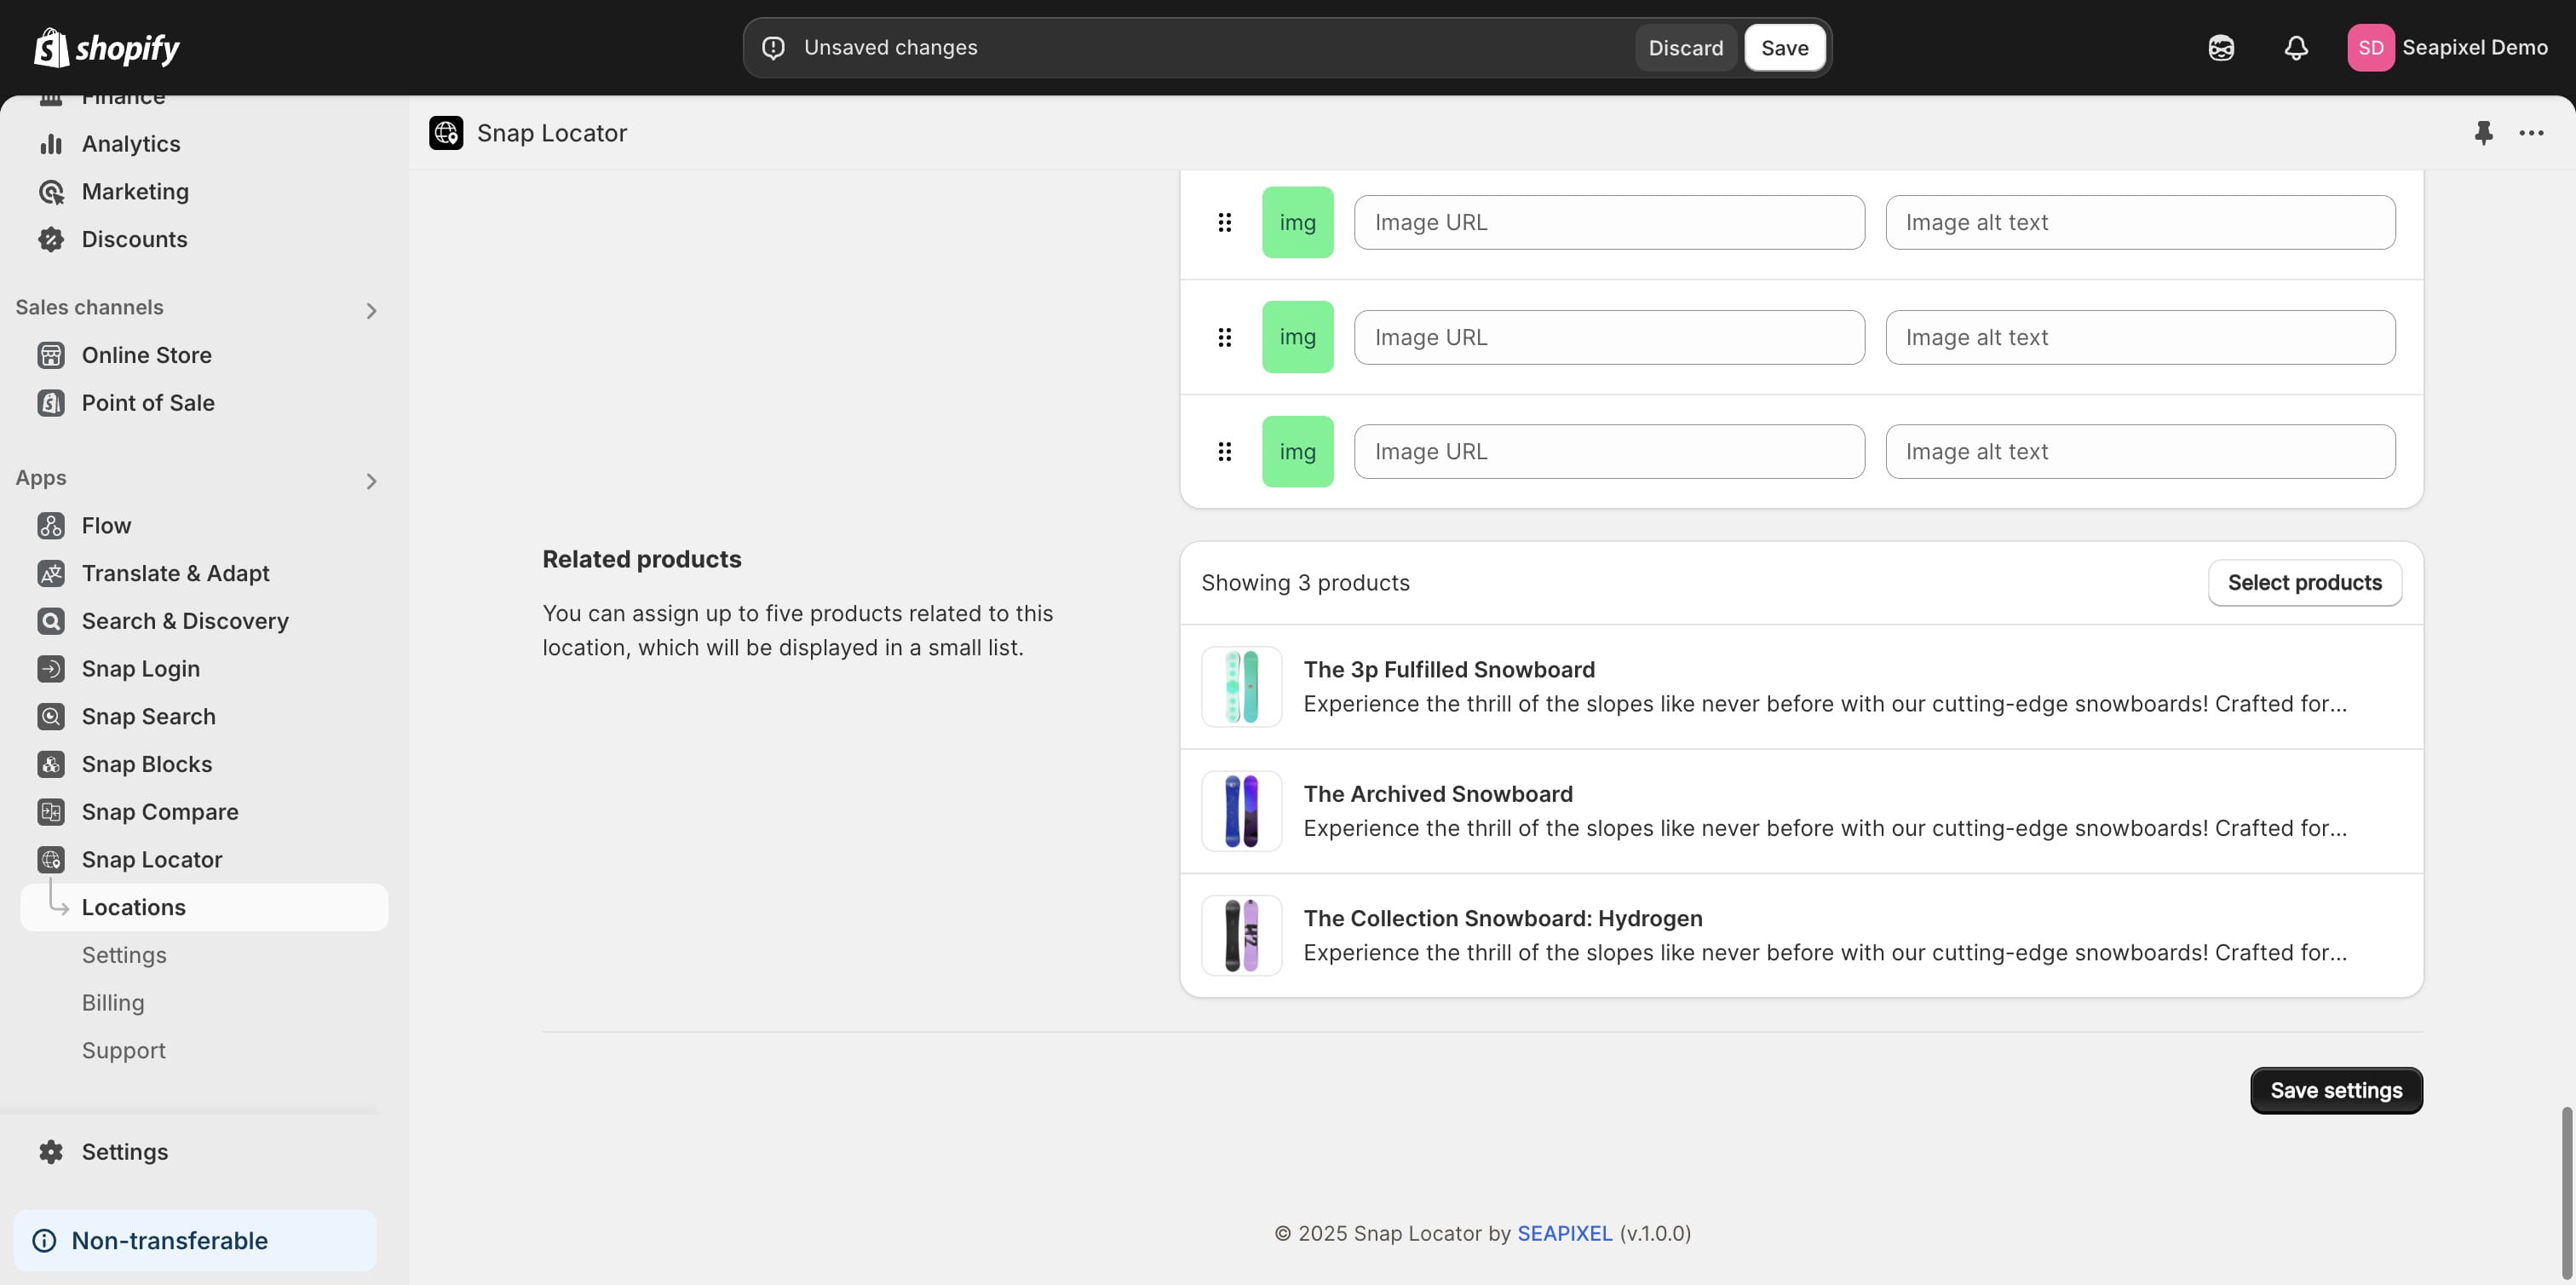
You have the option to create a gallery for each location, featuring up to five images. You can upload images using the built-in uploader to Shopify files, or alternatively, use image URLs directly.

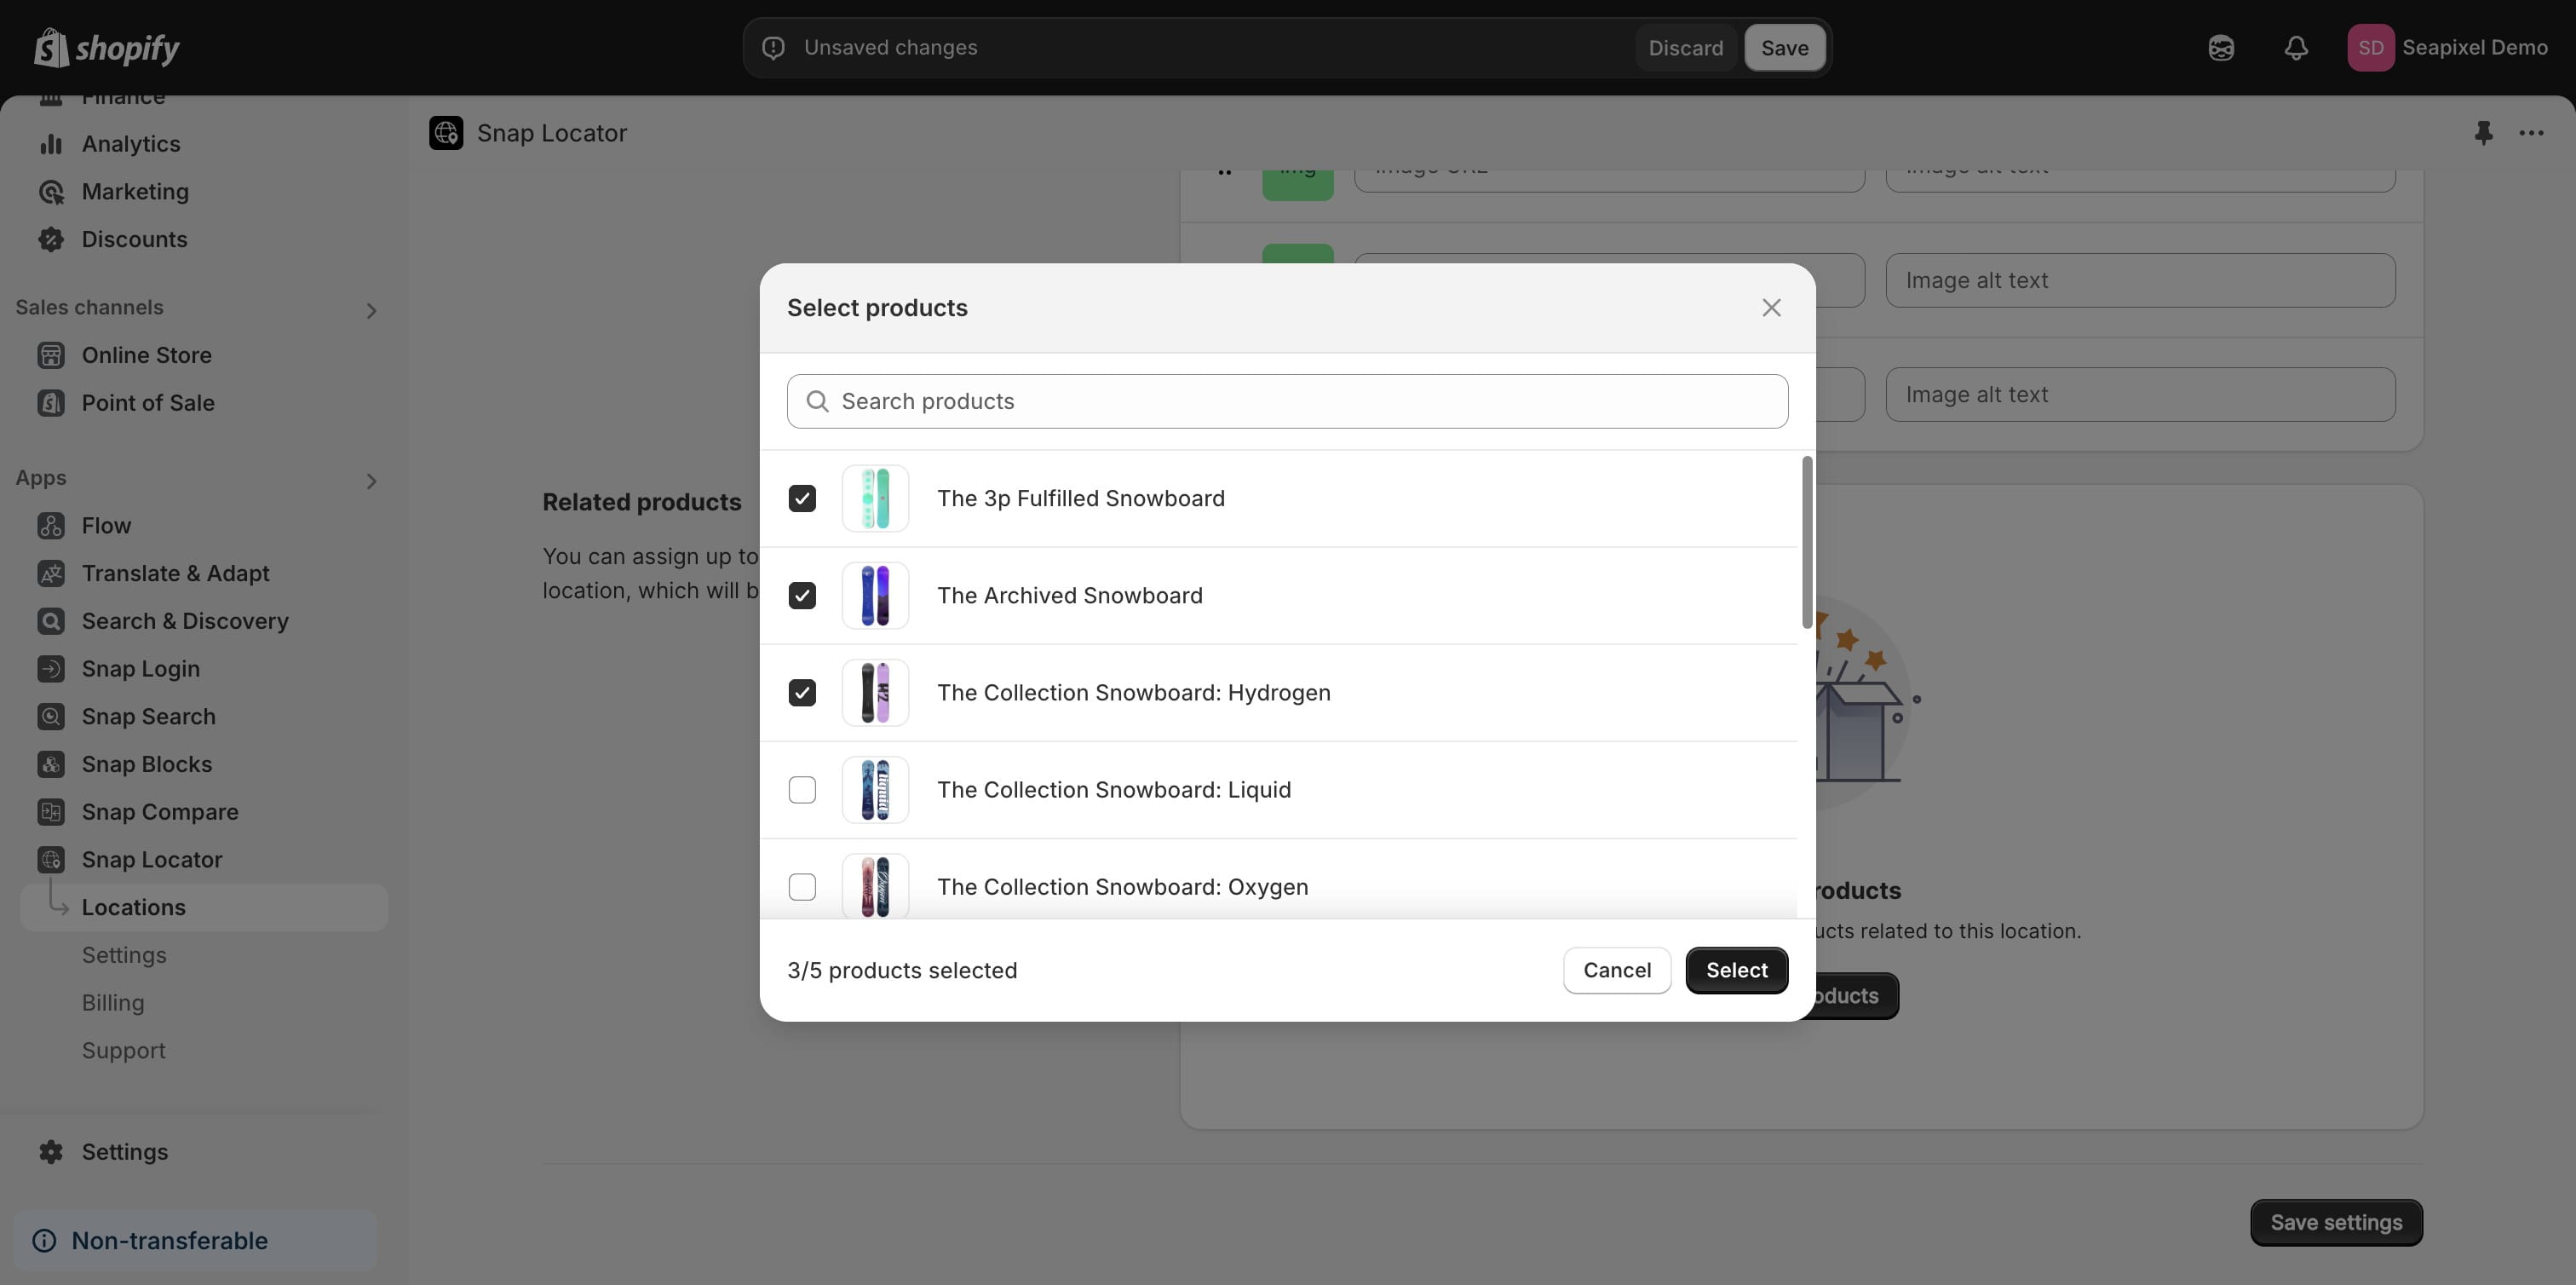
You can also assign up to five related products to each location.
The product selection modal will appear, allowing you to select your preferred products.
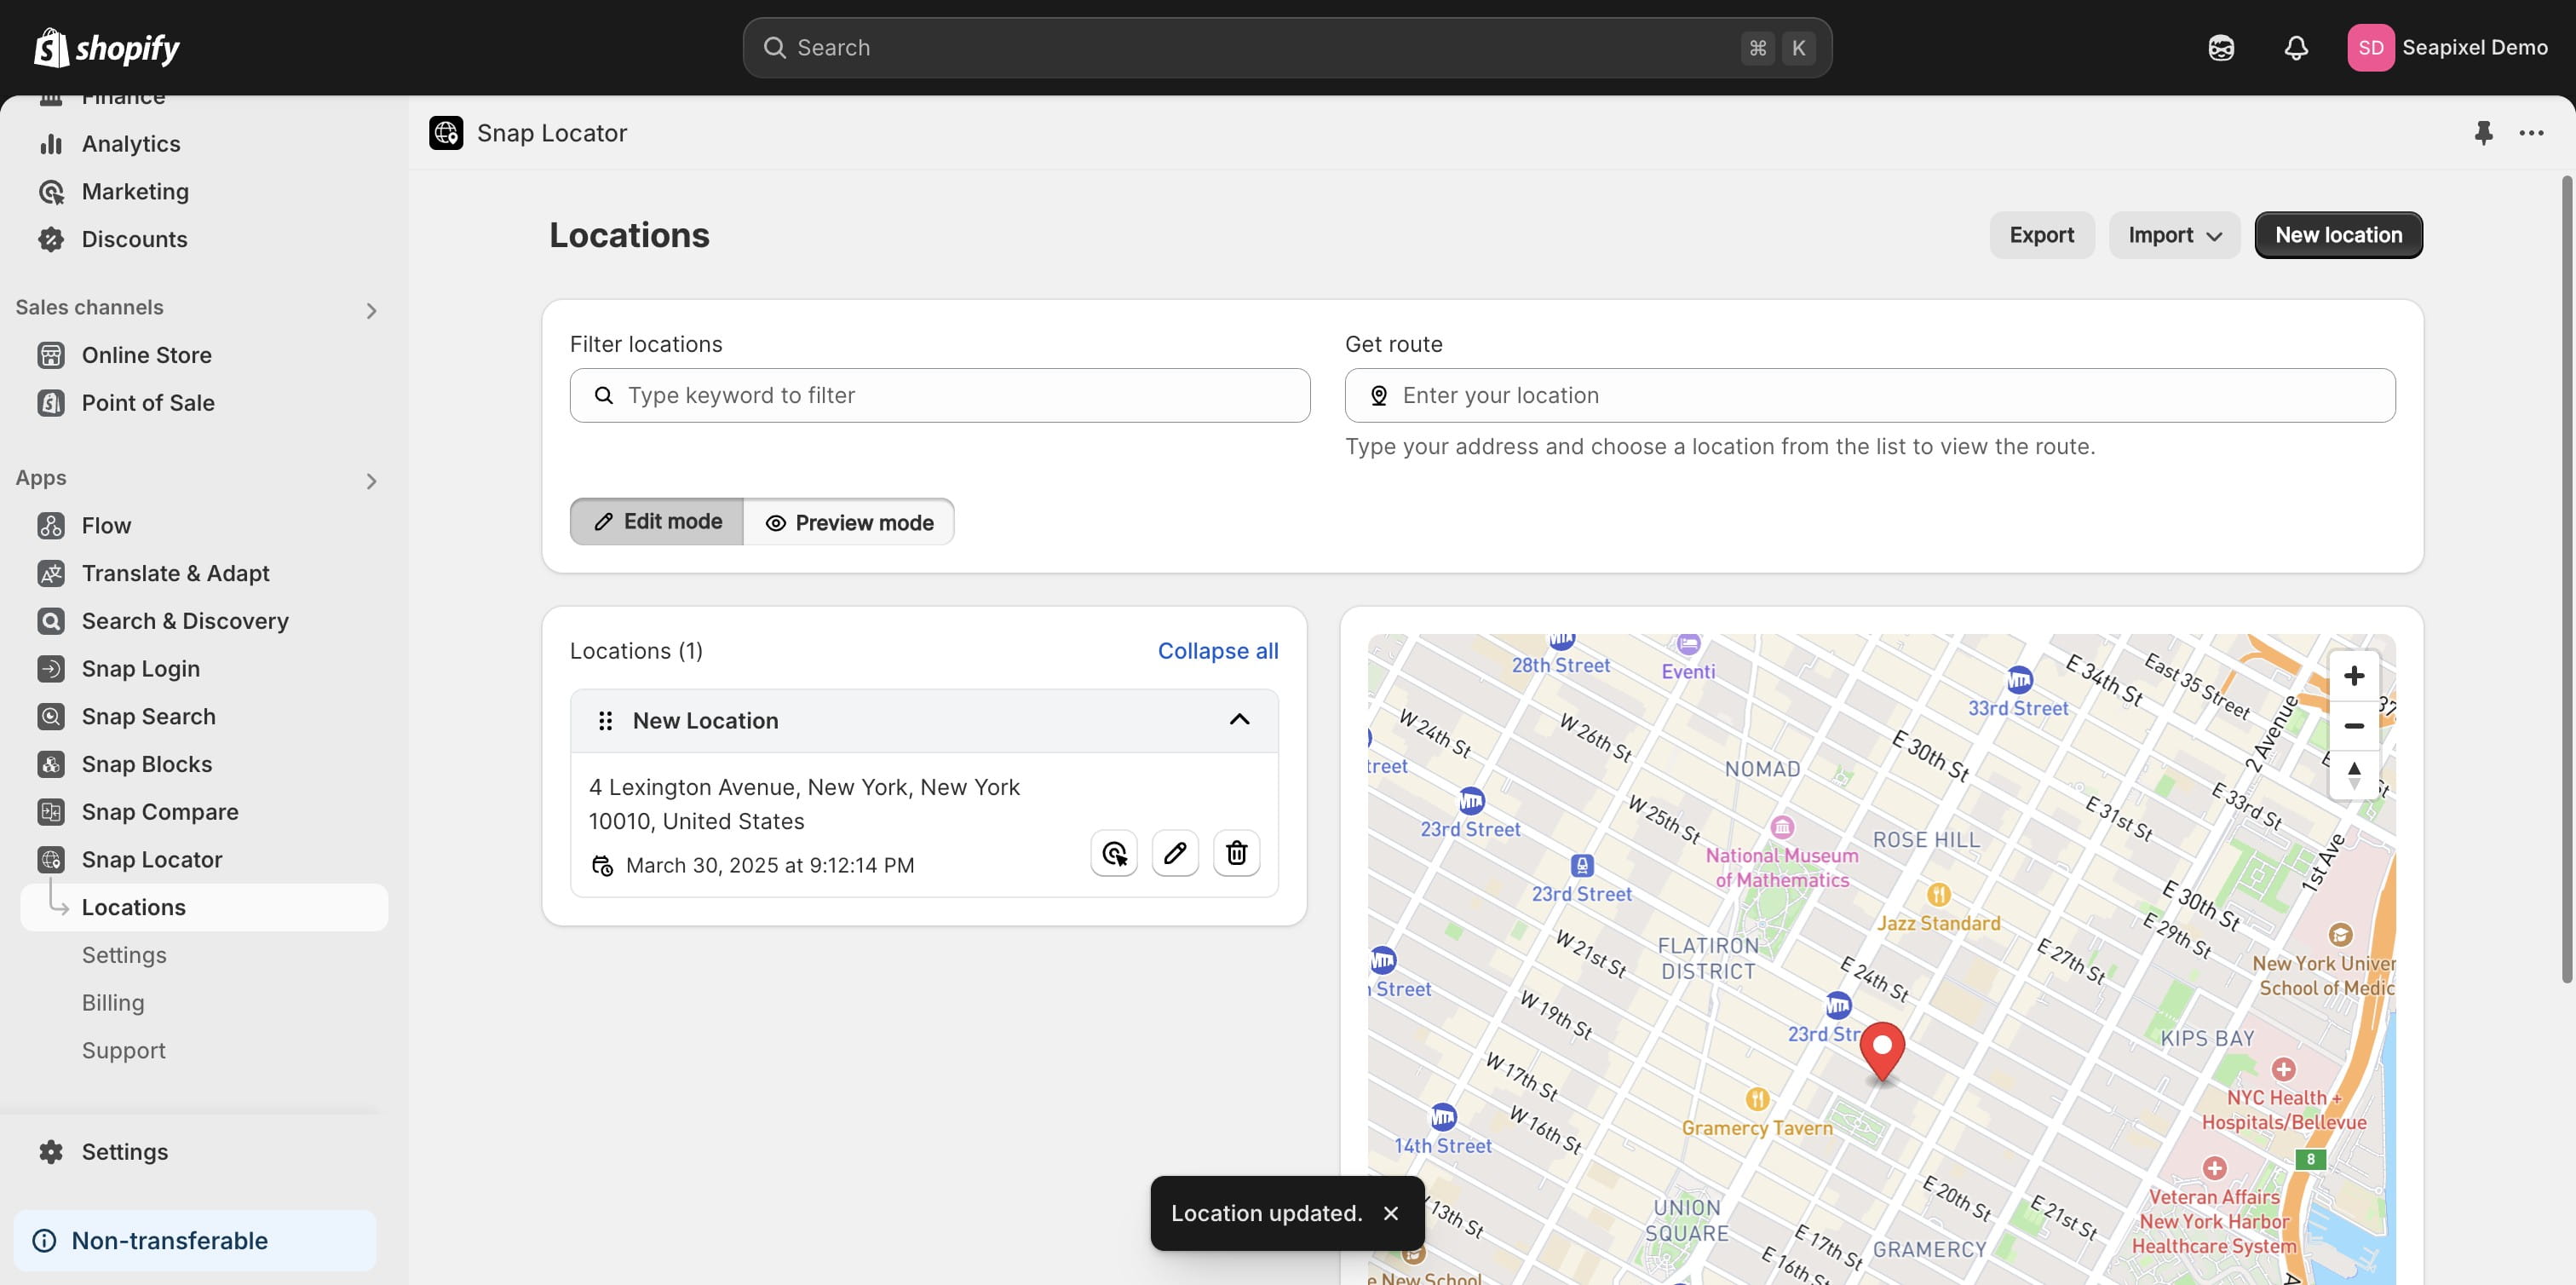
Once you've made your changes, click "Save settings".
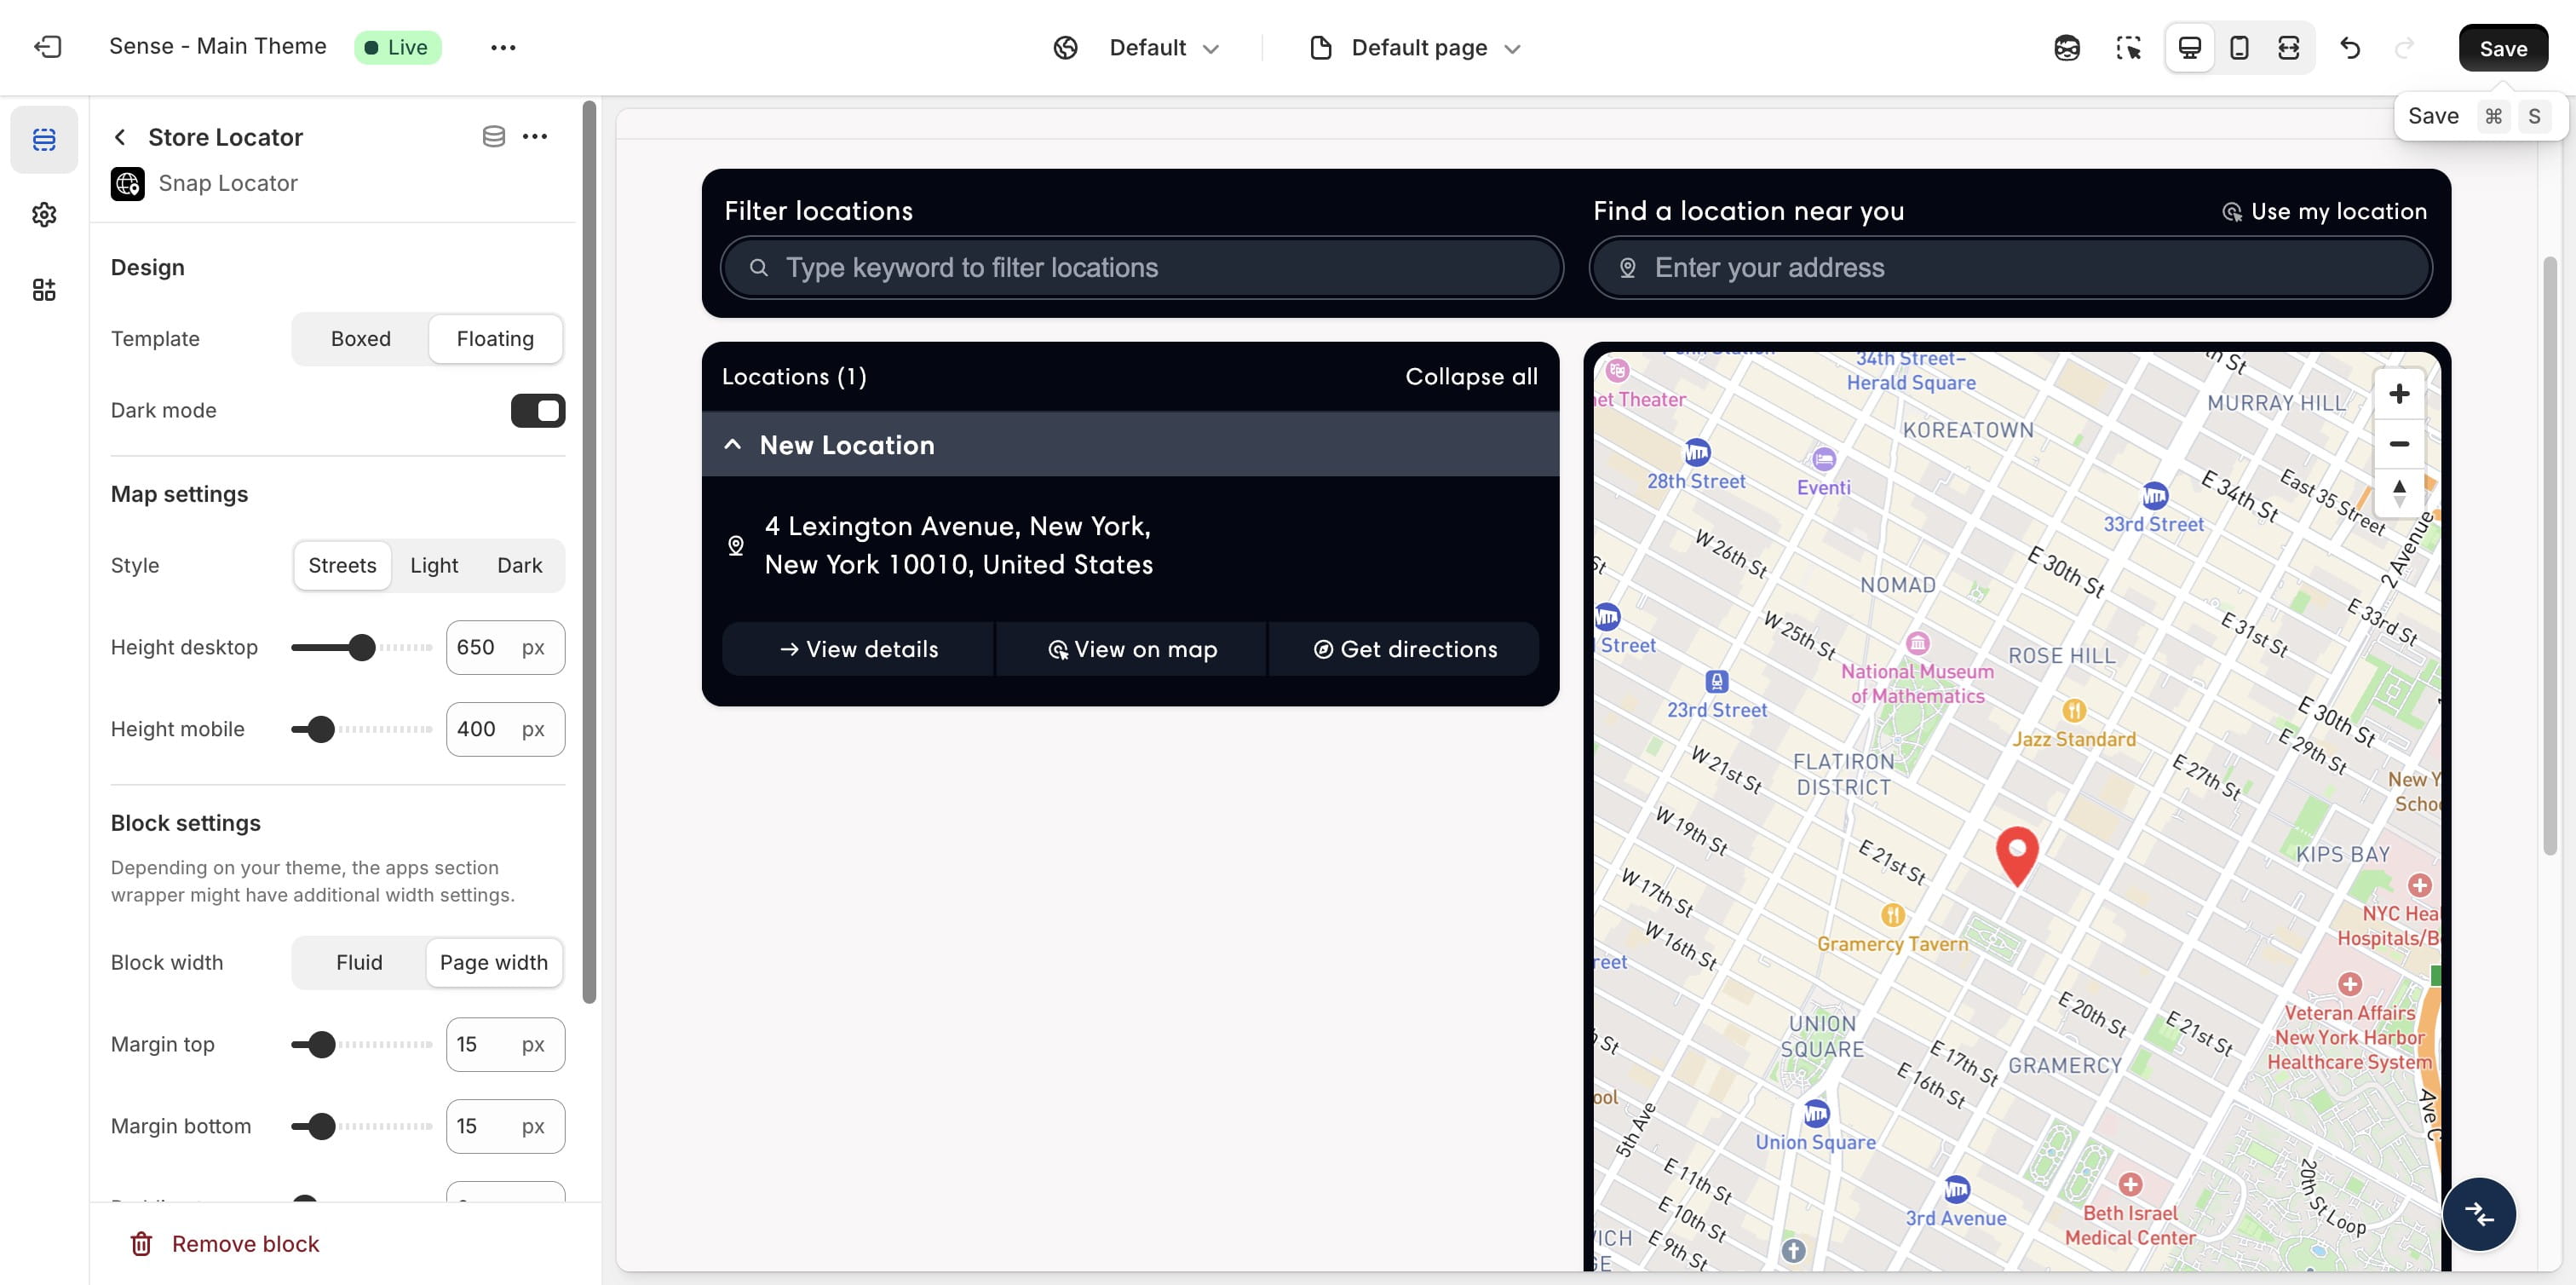
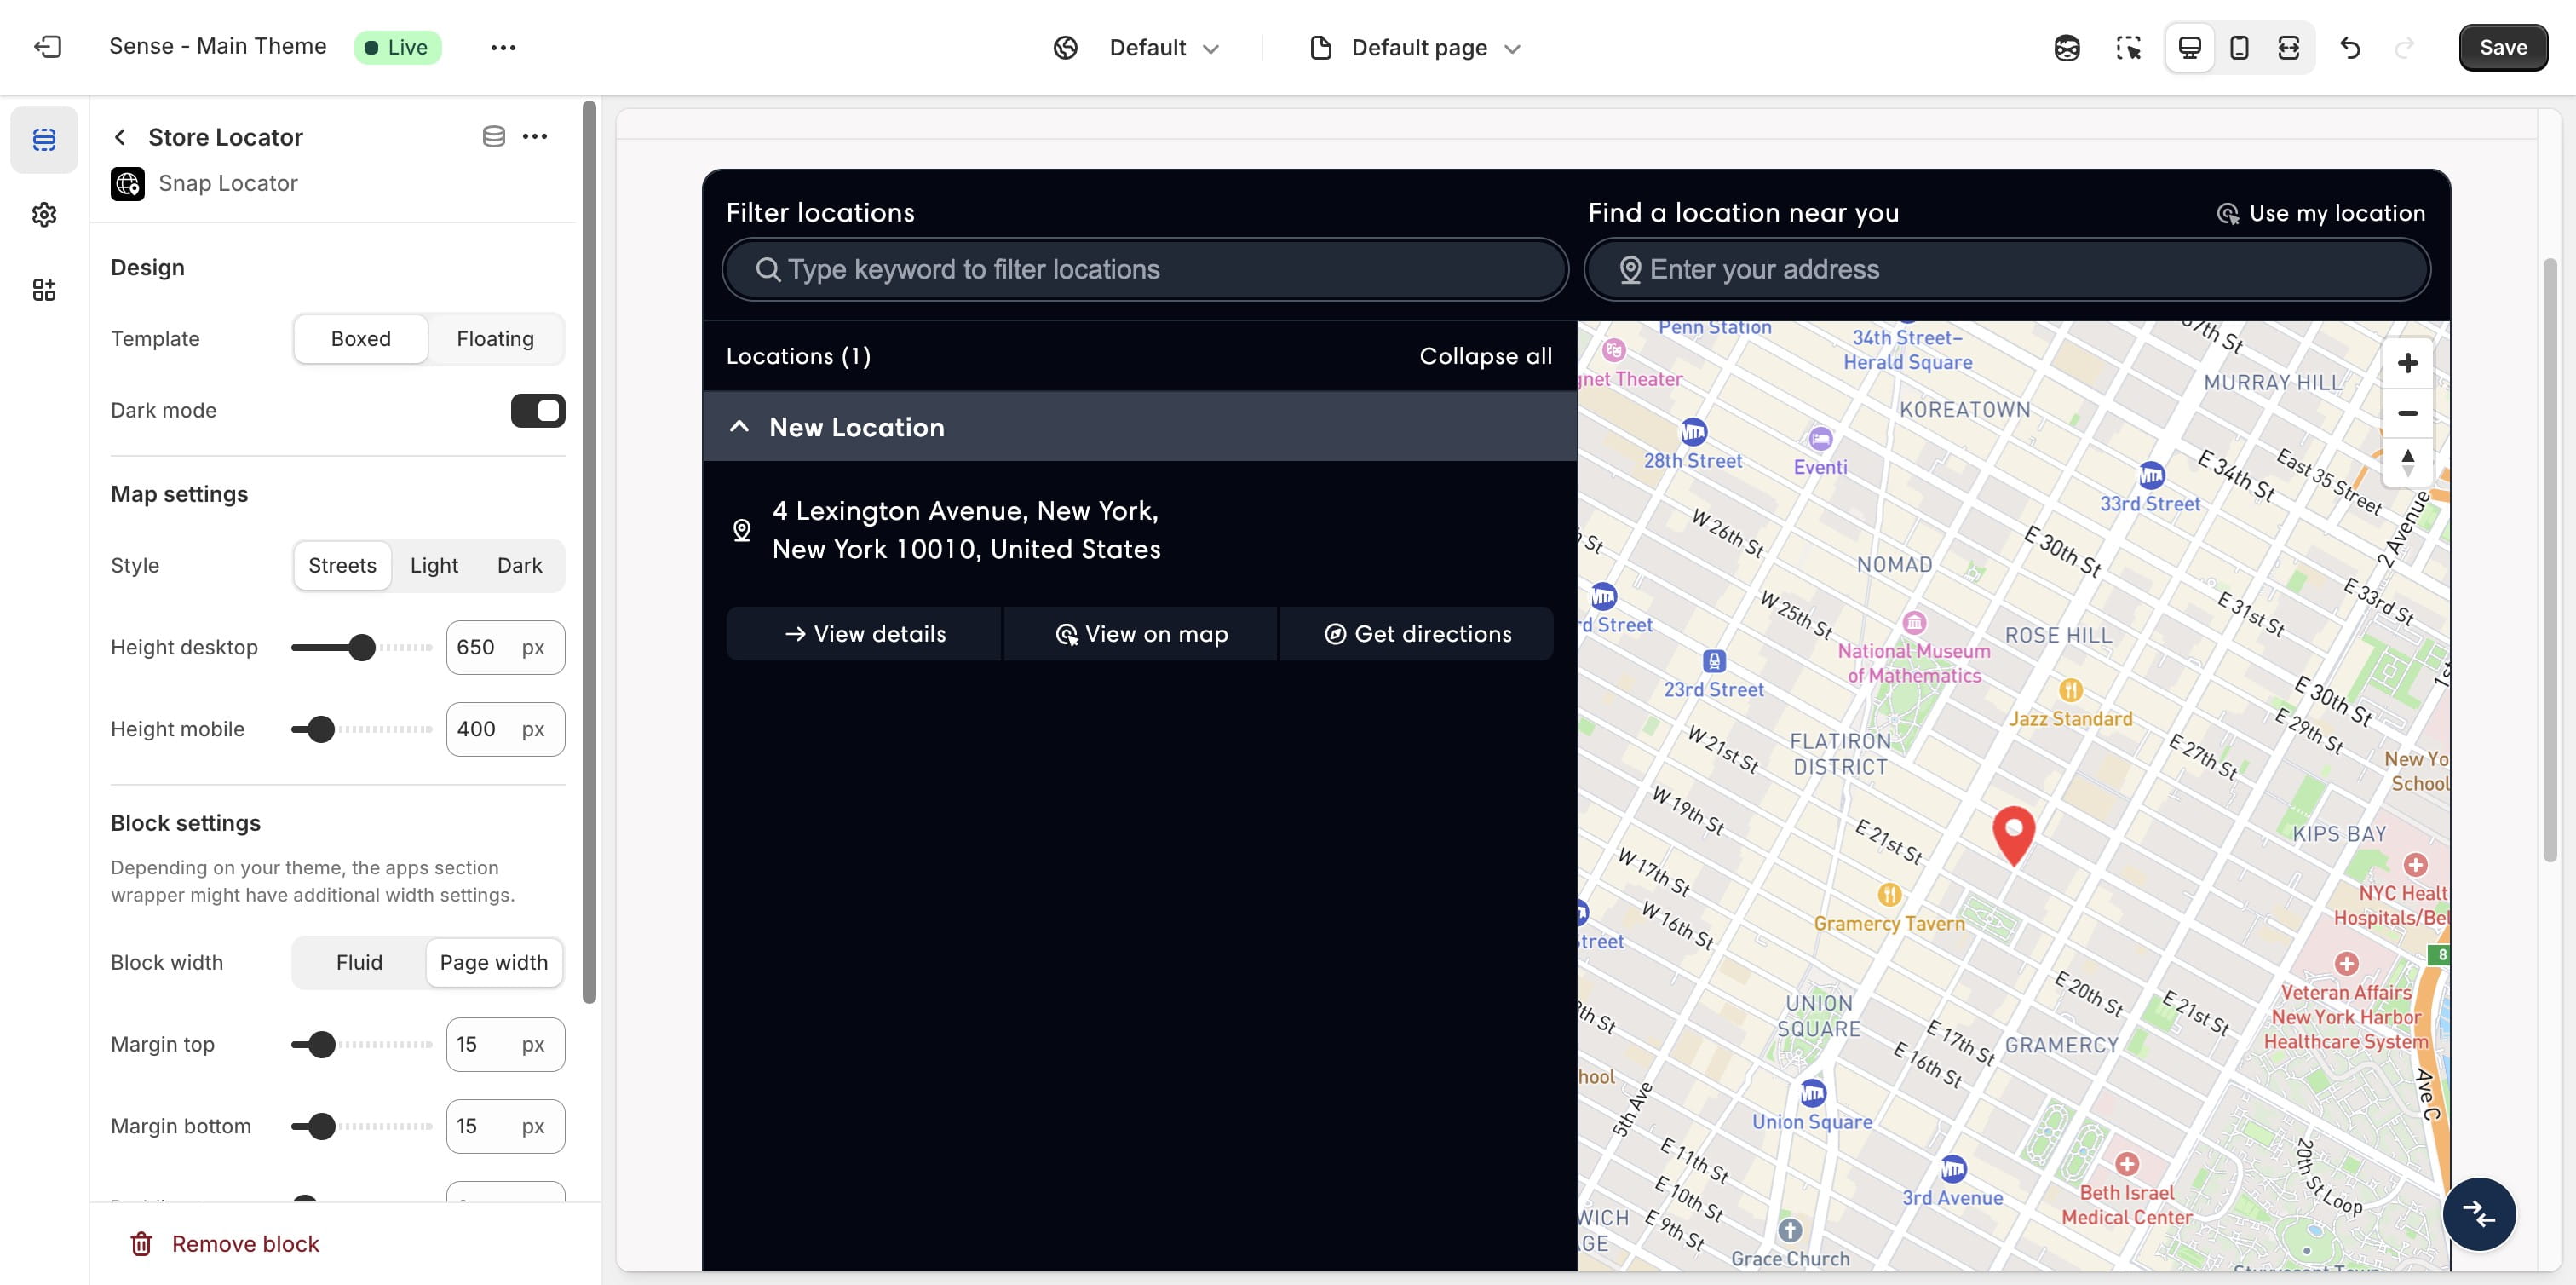
Return to the previous step to preview the location.
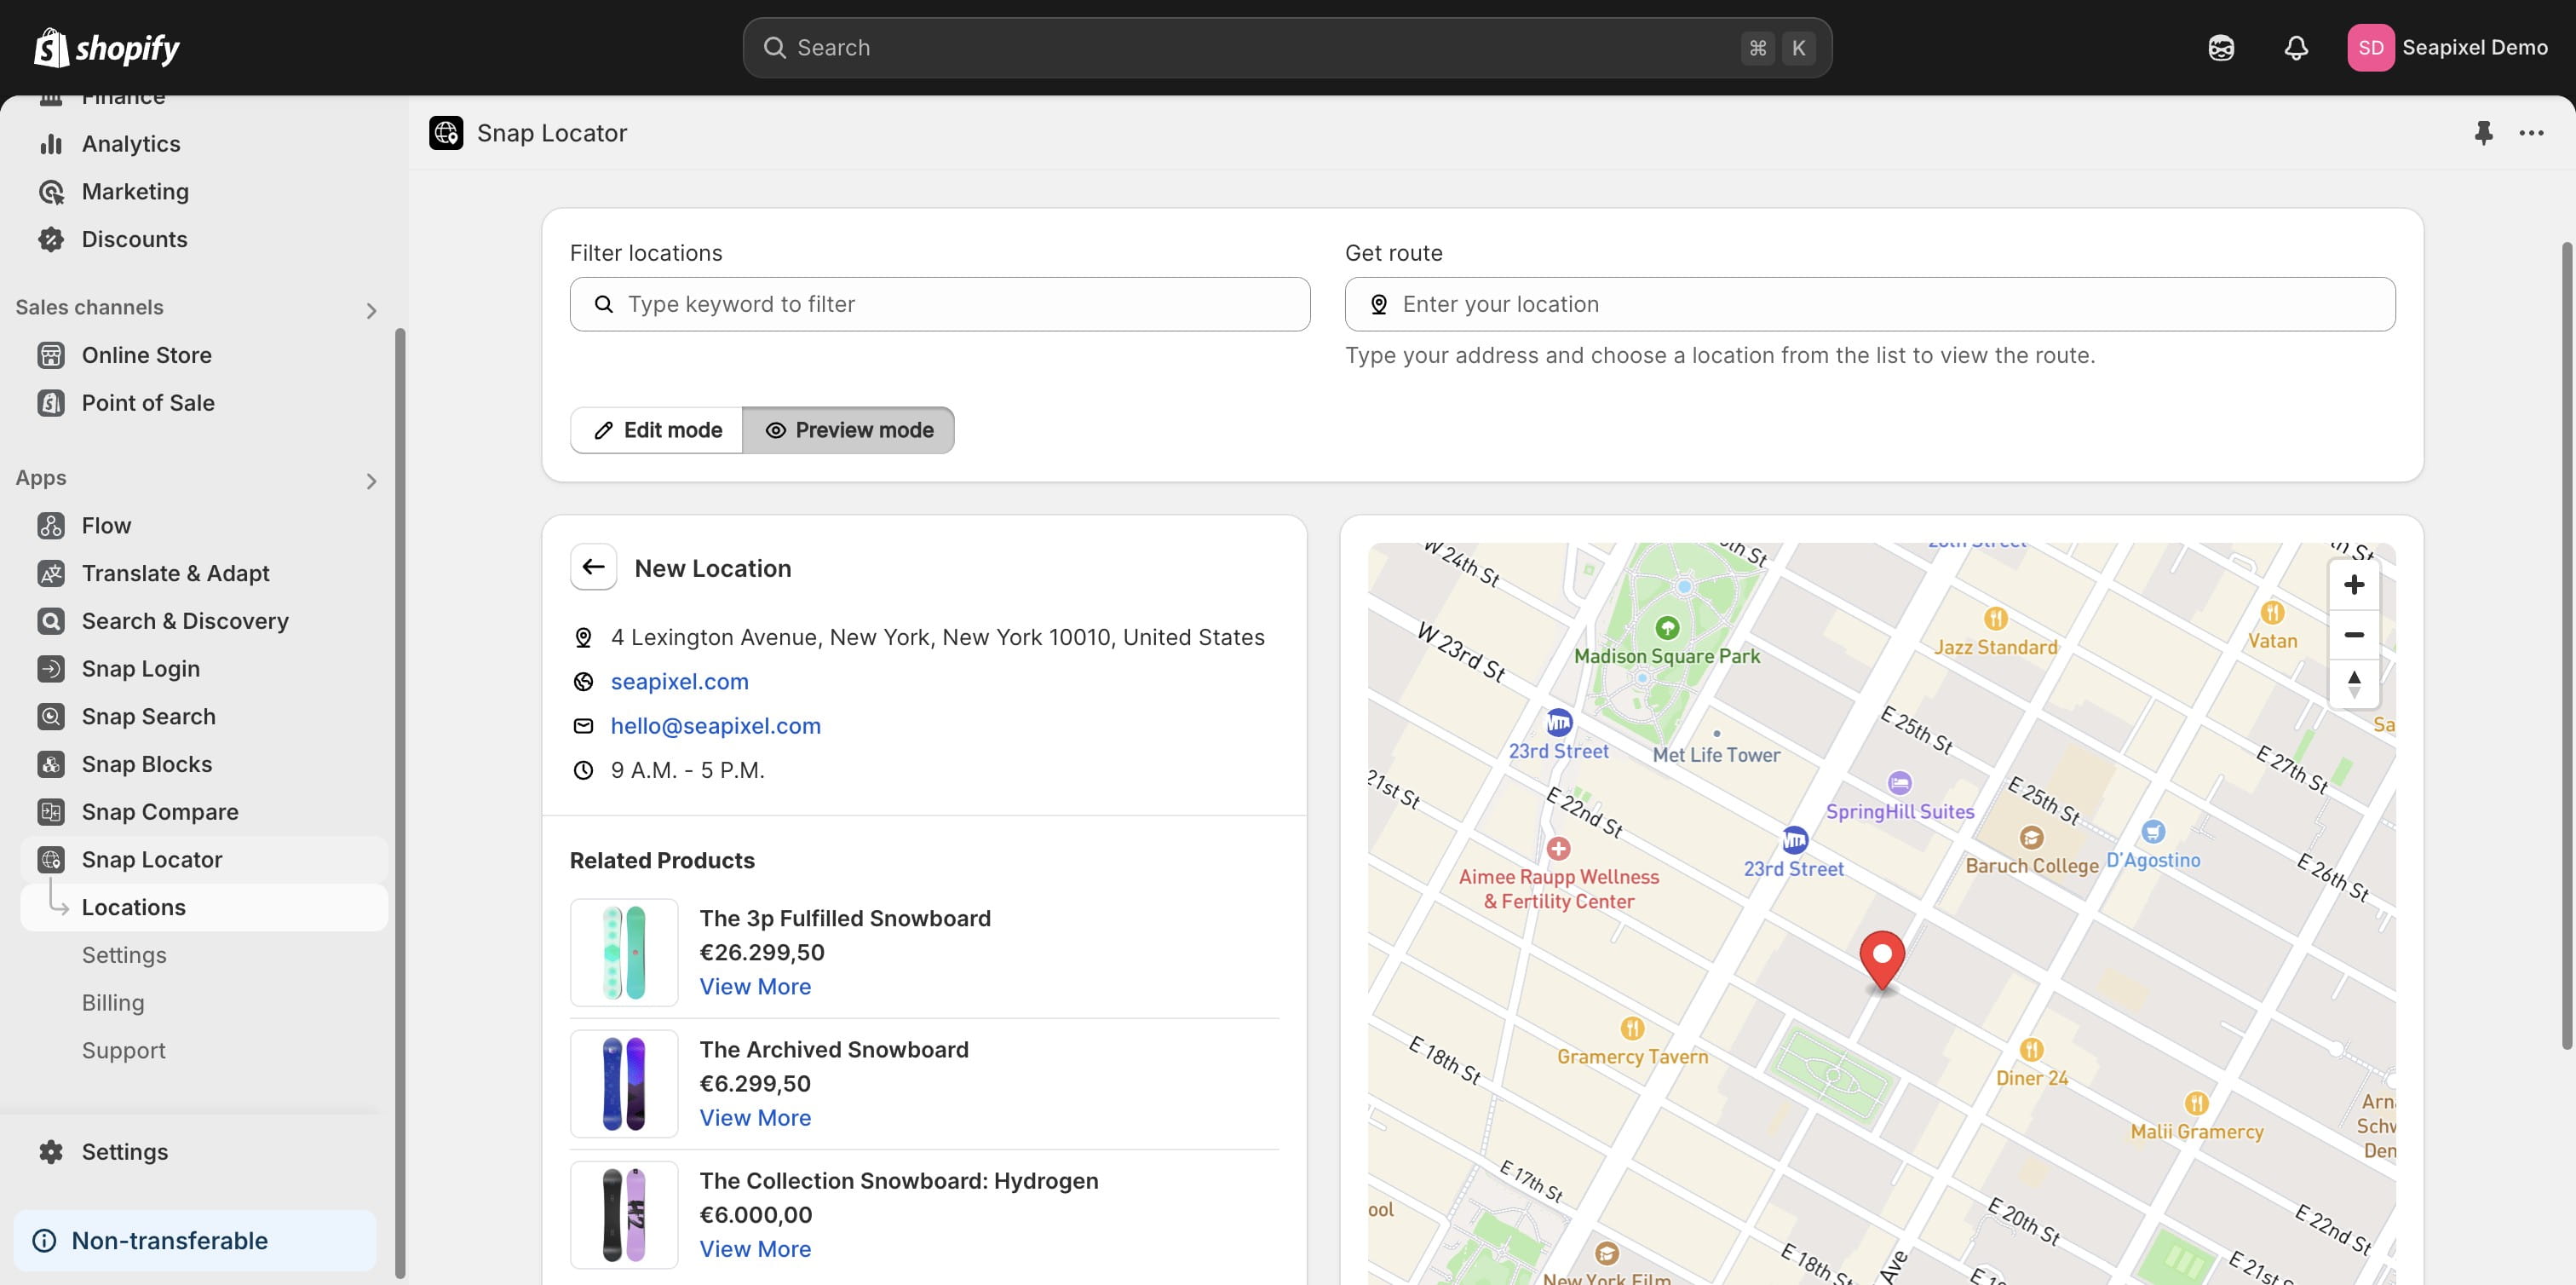
"Preview mode" allows you to verify the location's appearance.
Click "View details" to preview all location details, including the gallery and related products.

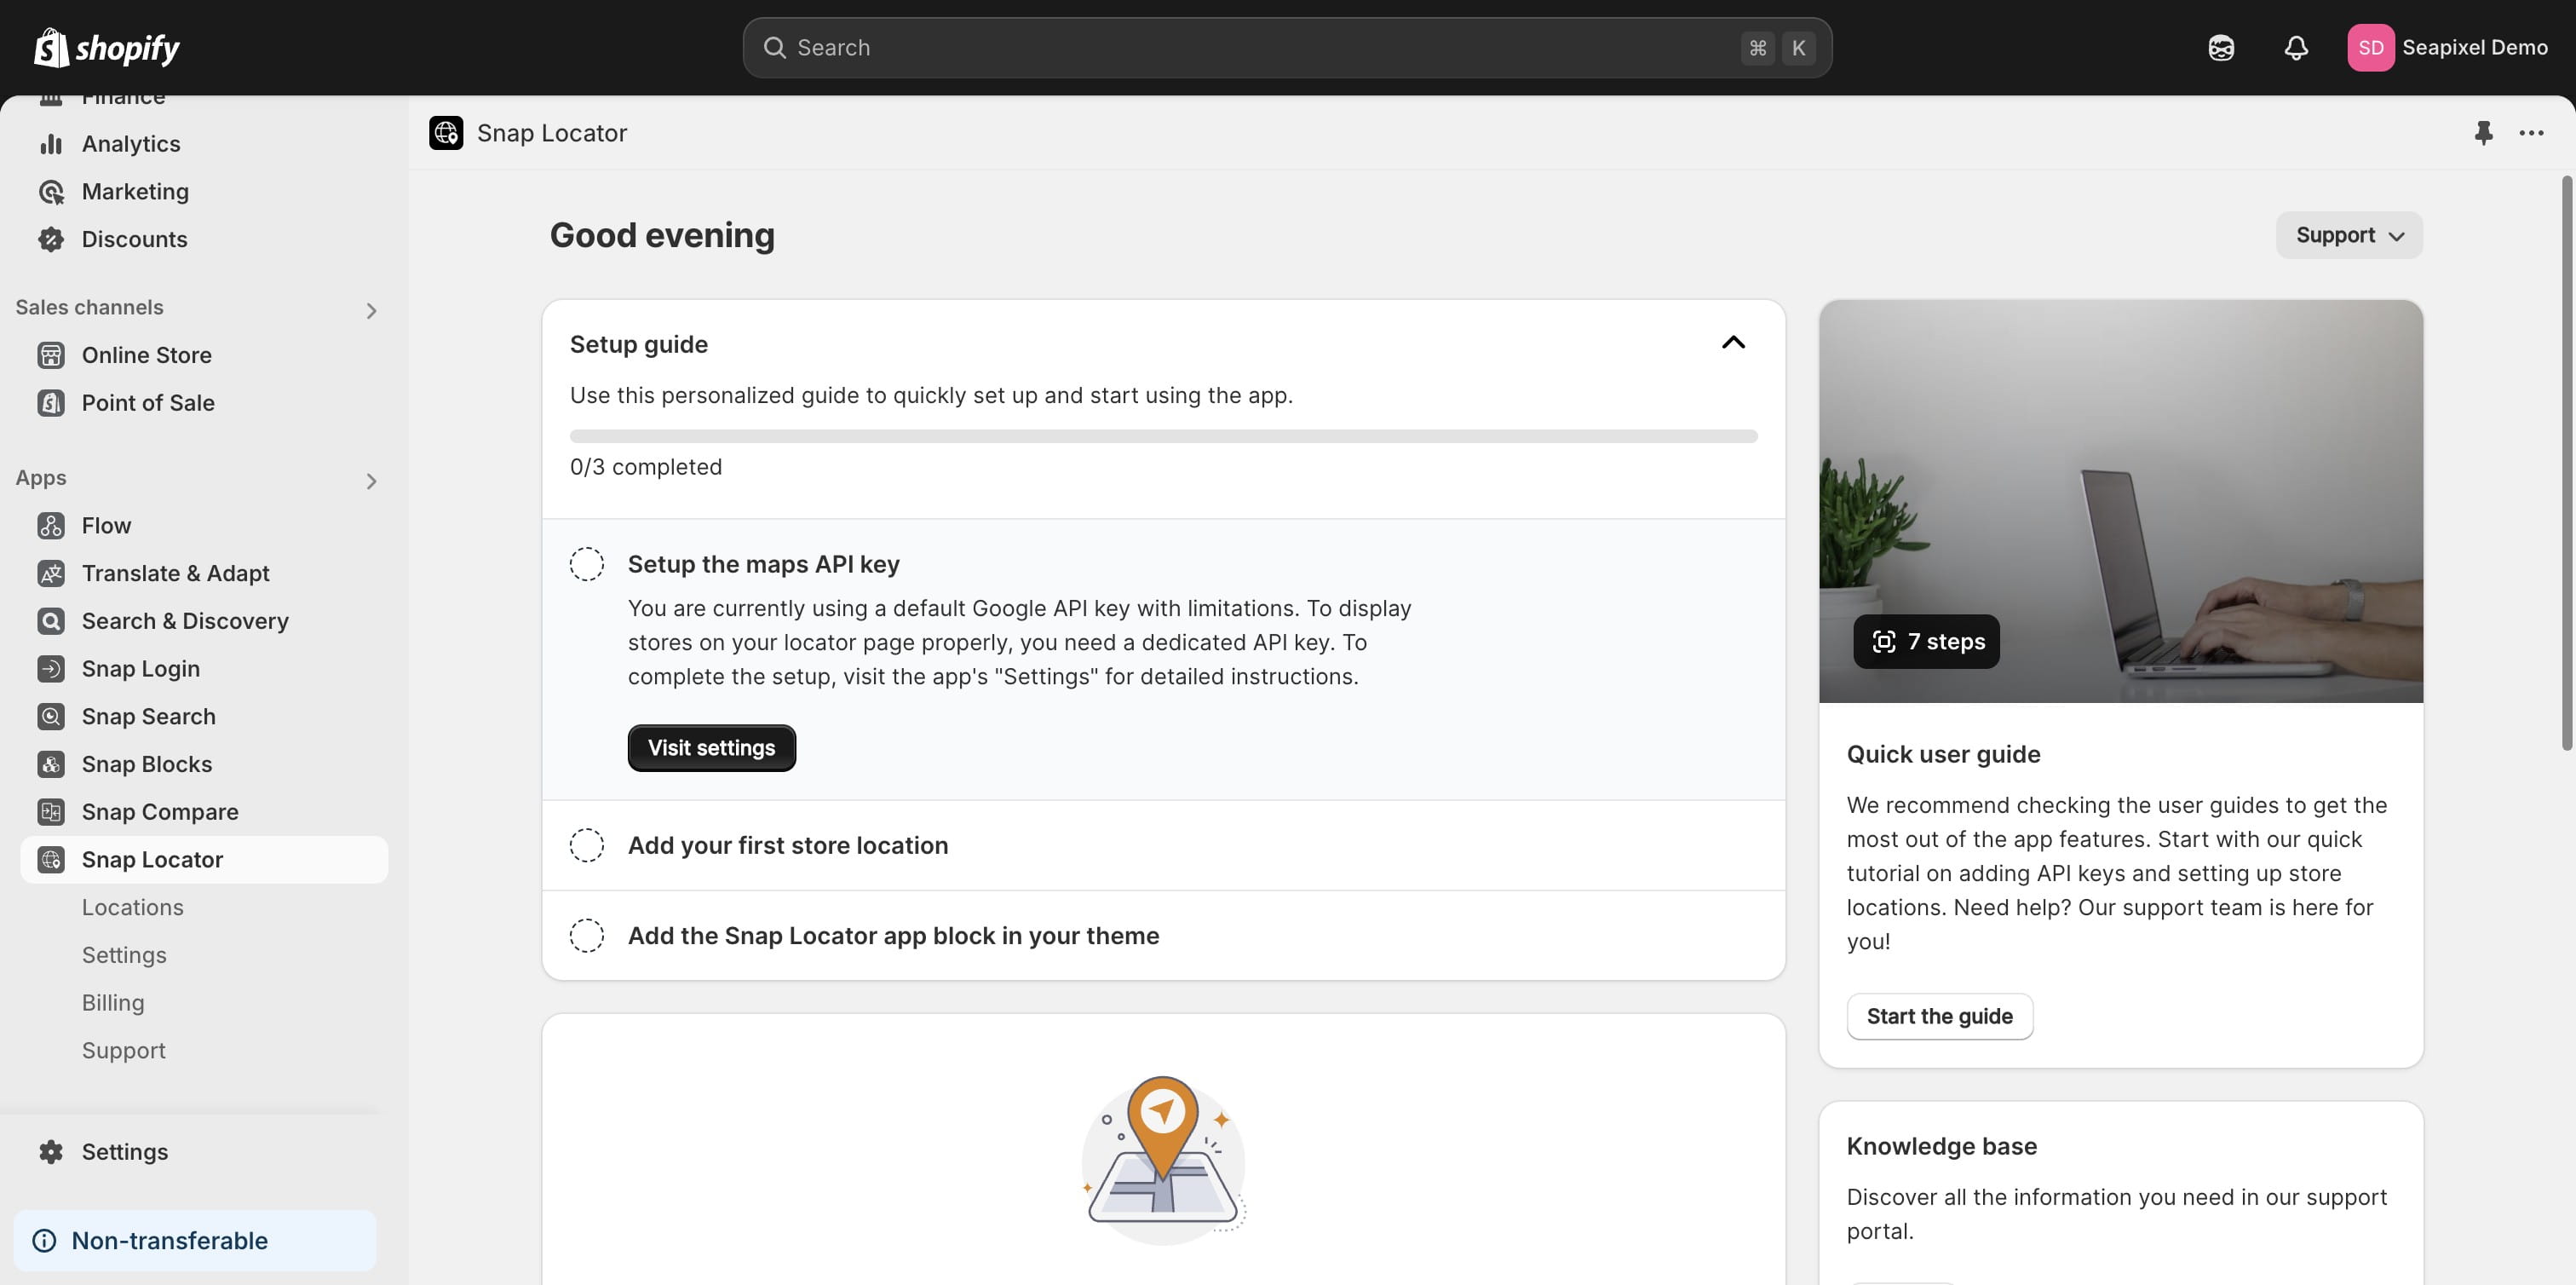
Navigate to the app's main page to complete the setup guide.
Let's add the Store Locator app block into your theme.

Once the app block has been added, you can review all available customization options.
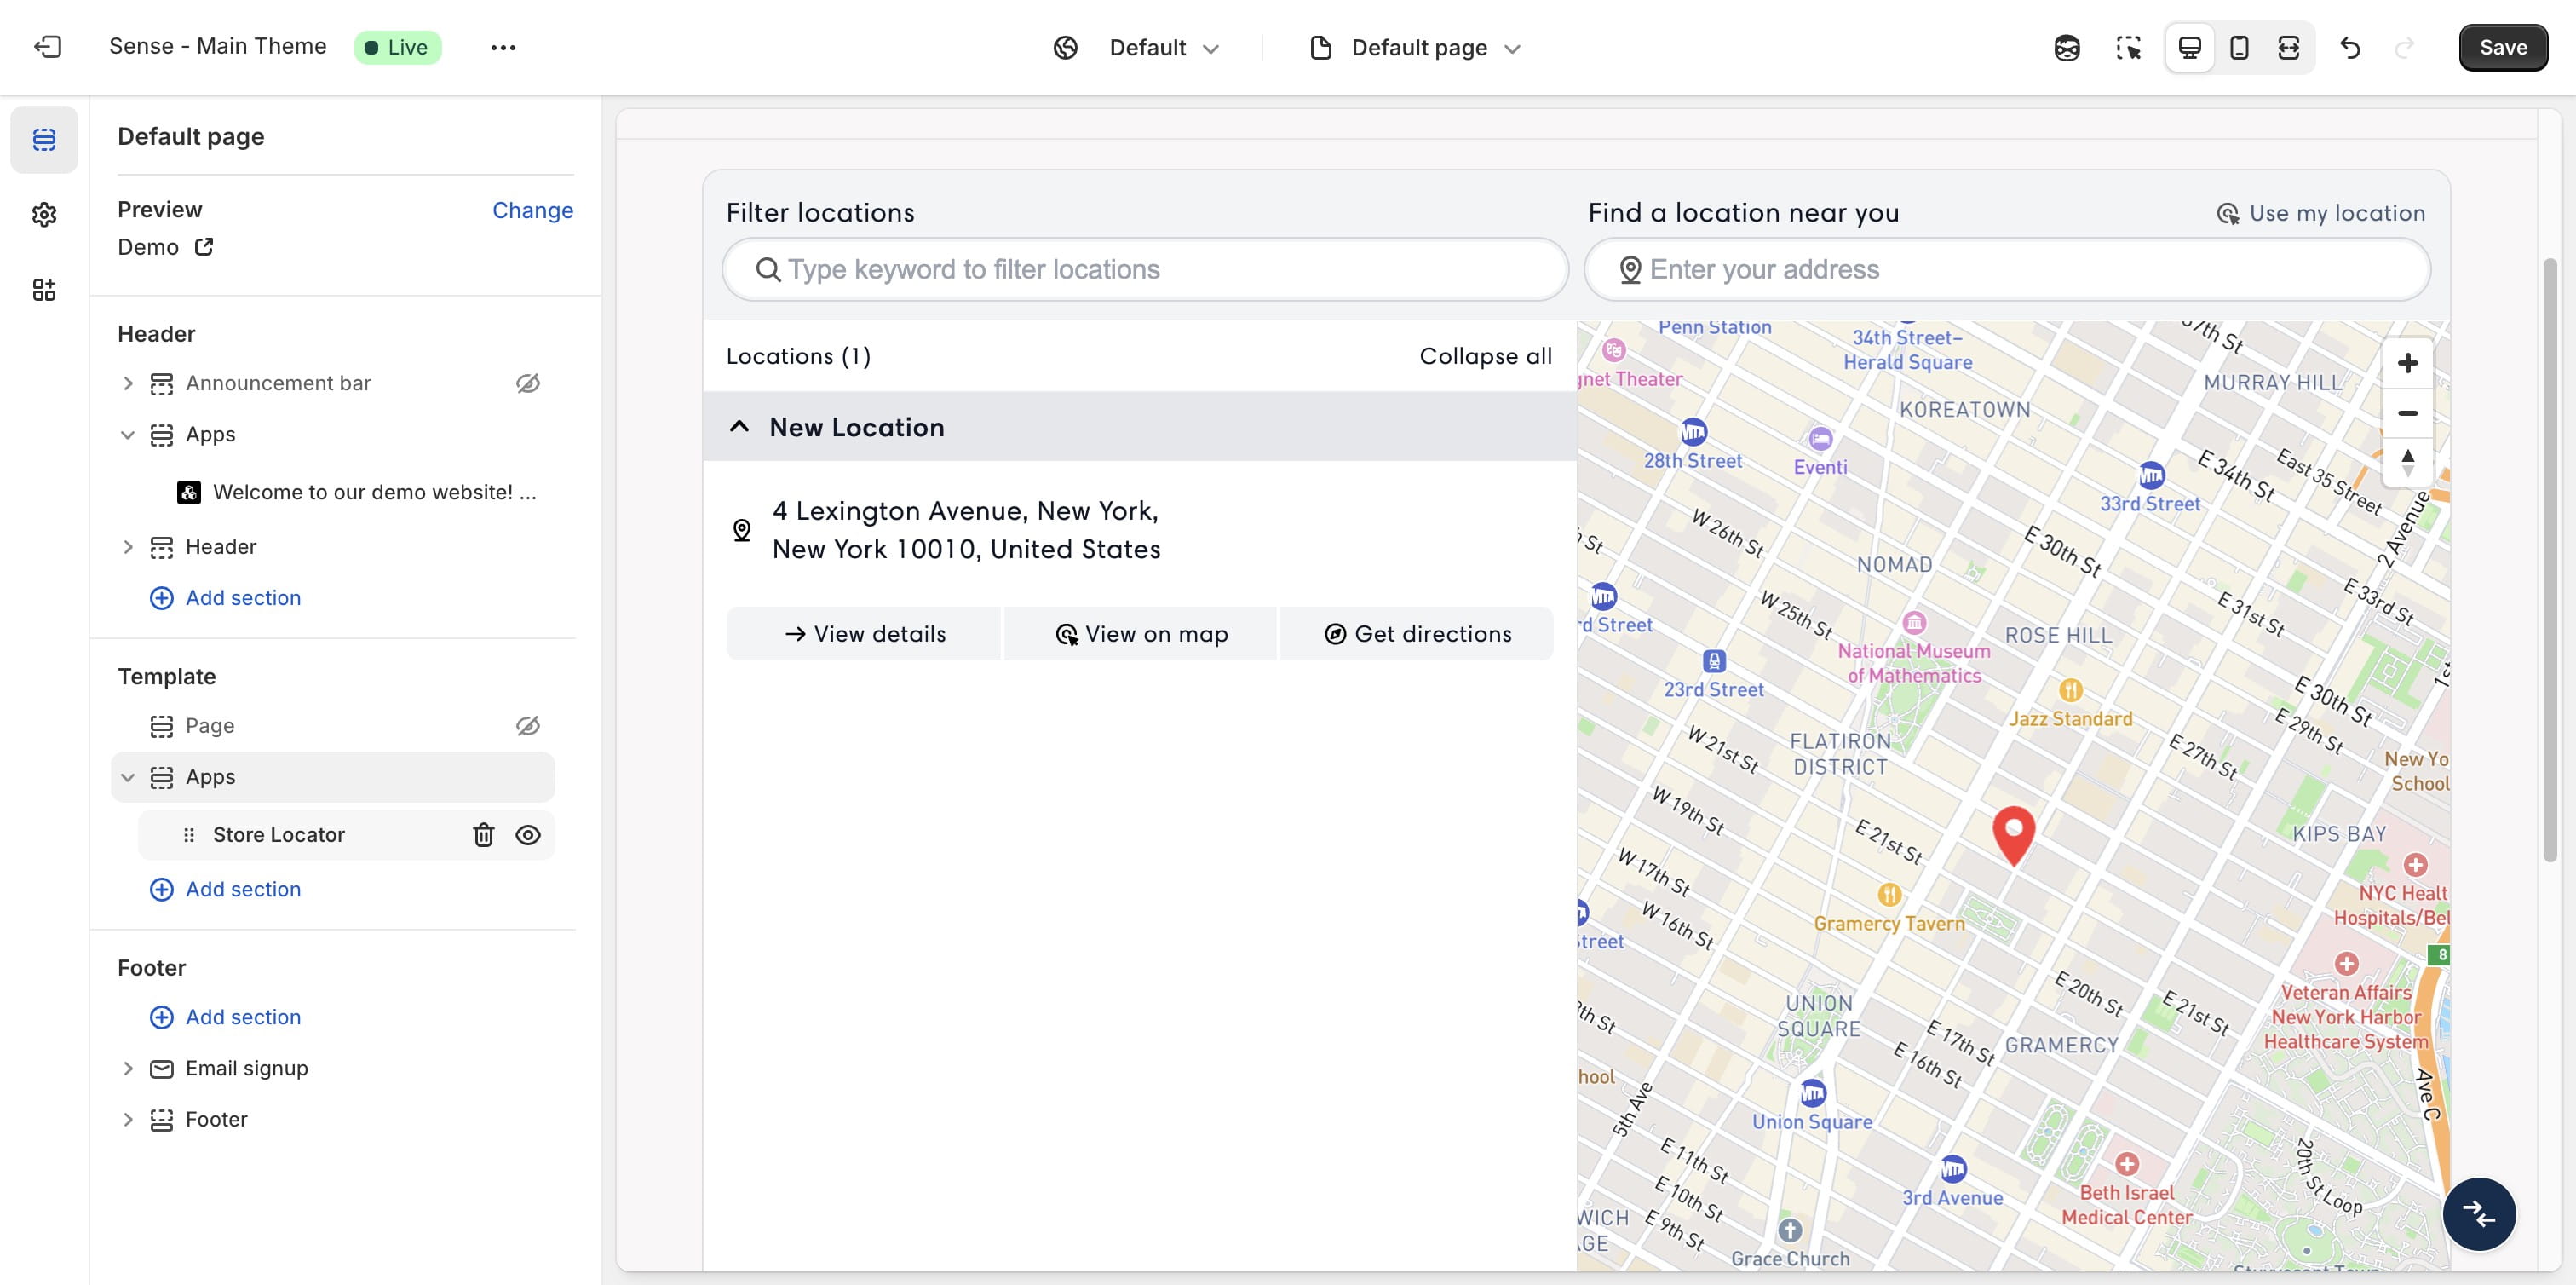
Explore the available design options, map styles, and more.
Click "Save" to publish the changes to your theme.